How HealixPlus Portal works
From the Admin setting up the hospital to the final payment receipt — a complete, role-by-role walkthrough of every step in the portal.
Admin configures the hospital
Done once before the portal goes live. Takes 15–30 minutes.
Admin Login
The Admin is the first user created during deployment. They log in with their credentials and land on the Admin Dashboard — the control centre for the entire portal.
- ✓Secure JWT-based authentication
- ✓Admin Dashboard shows system-wide stats at a glance
- ✓All sensitive sections (staff, permissions, audit logs) are admin-only

Create Departments & Specialisations
Before registering any staff, the Admin creates the hospital's departments (e.g., Cardiology, Orthopaedics, General Medicine) and the specialisations within each department.
- ✓Unlimited departments and specialisations
- ✓Each department can be activated or deactivated
- ✓Doctors are later assigned to their specialisation

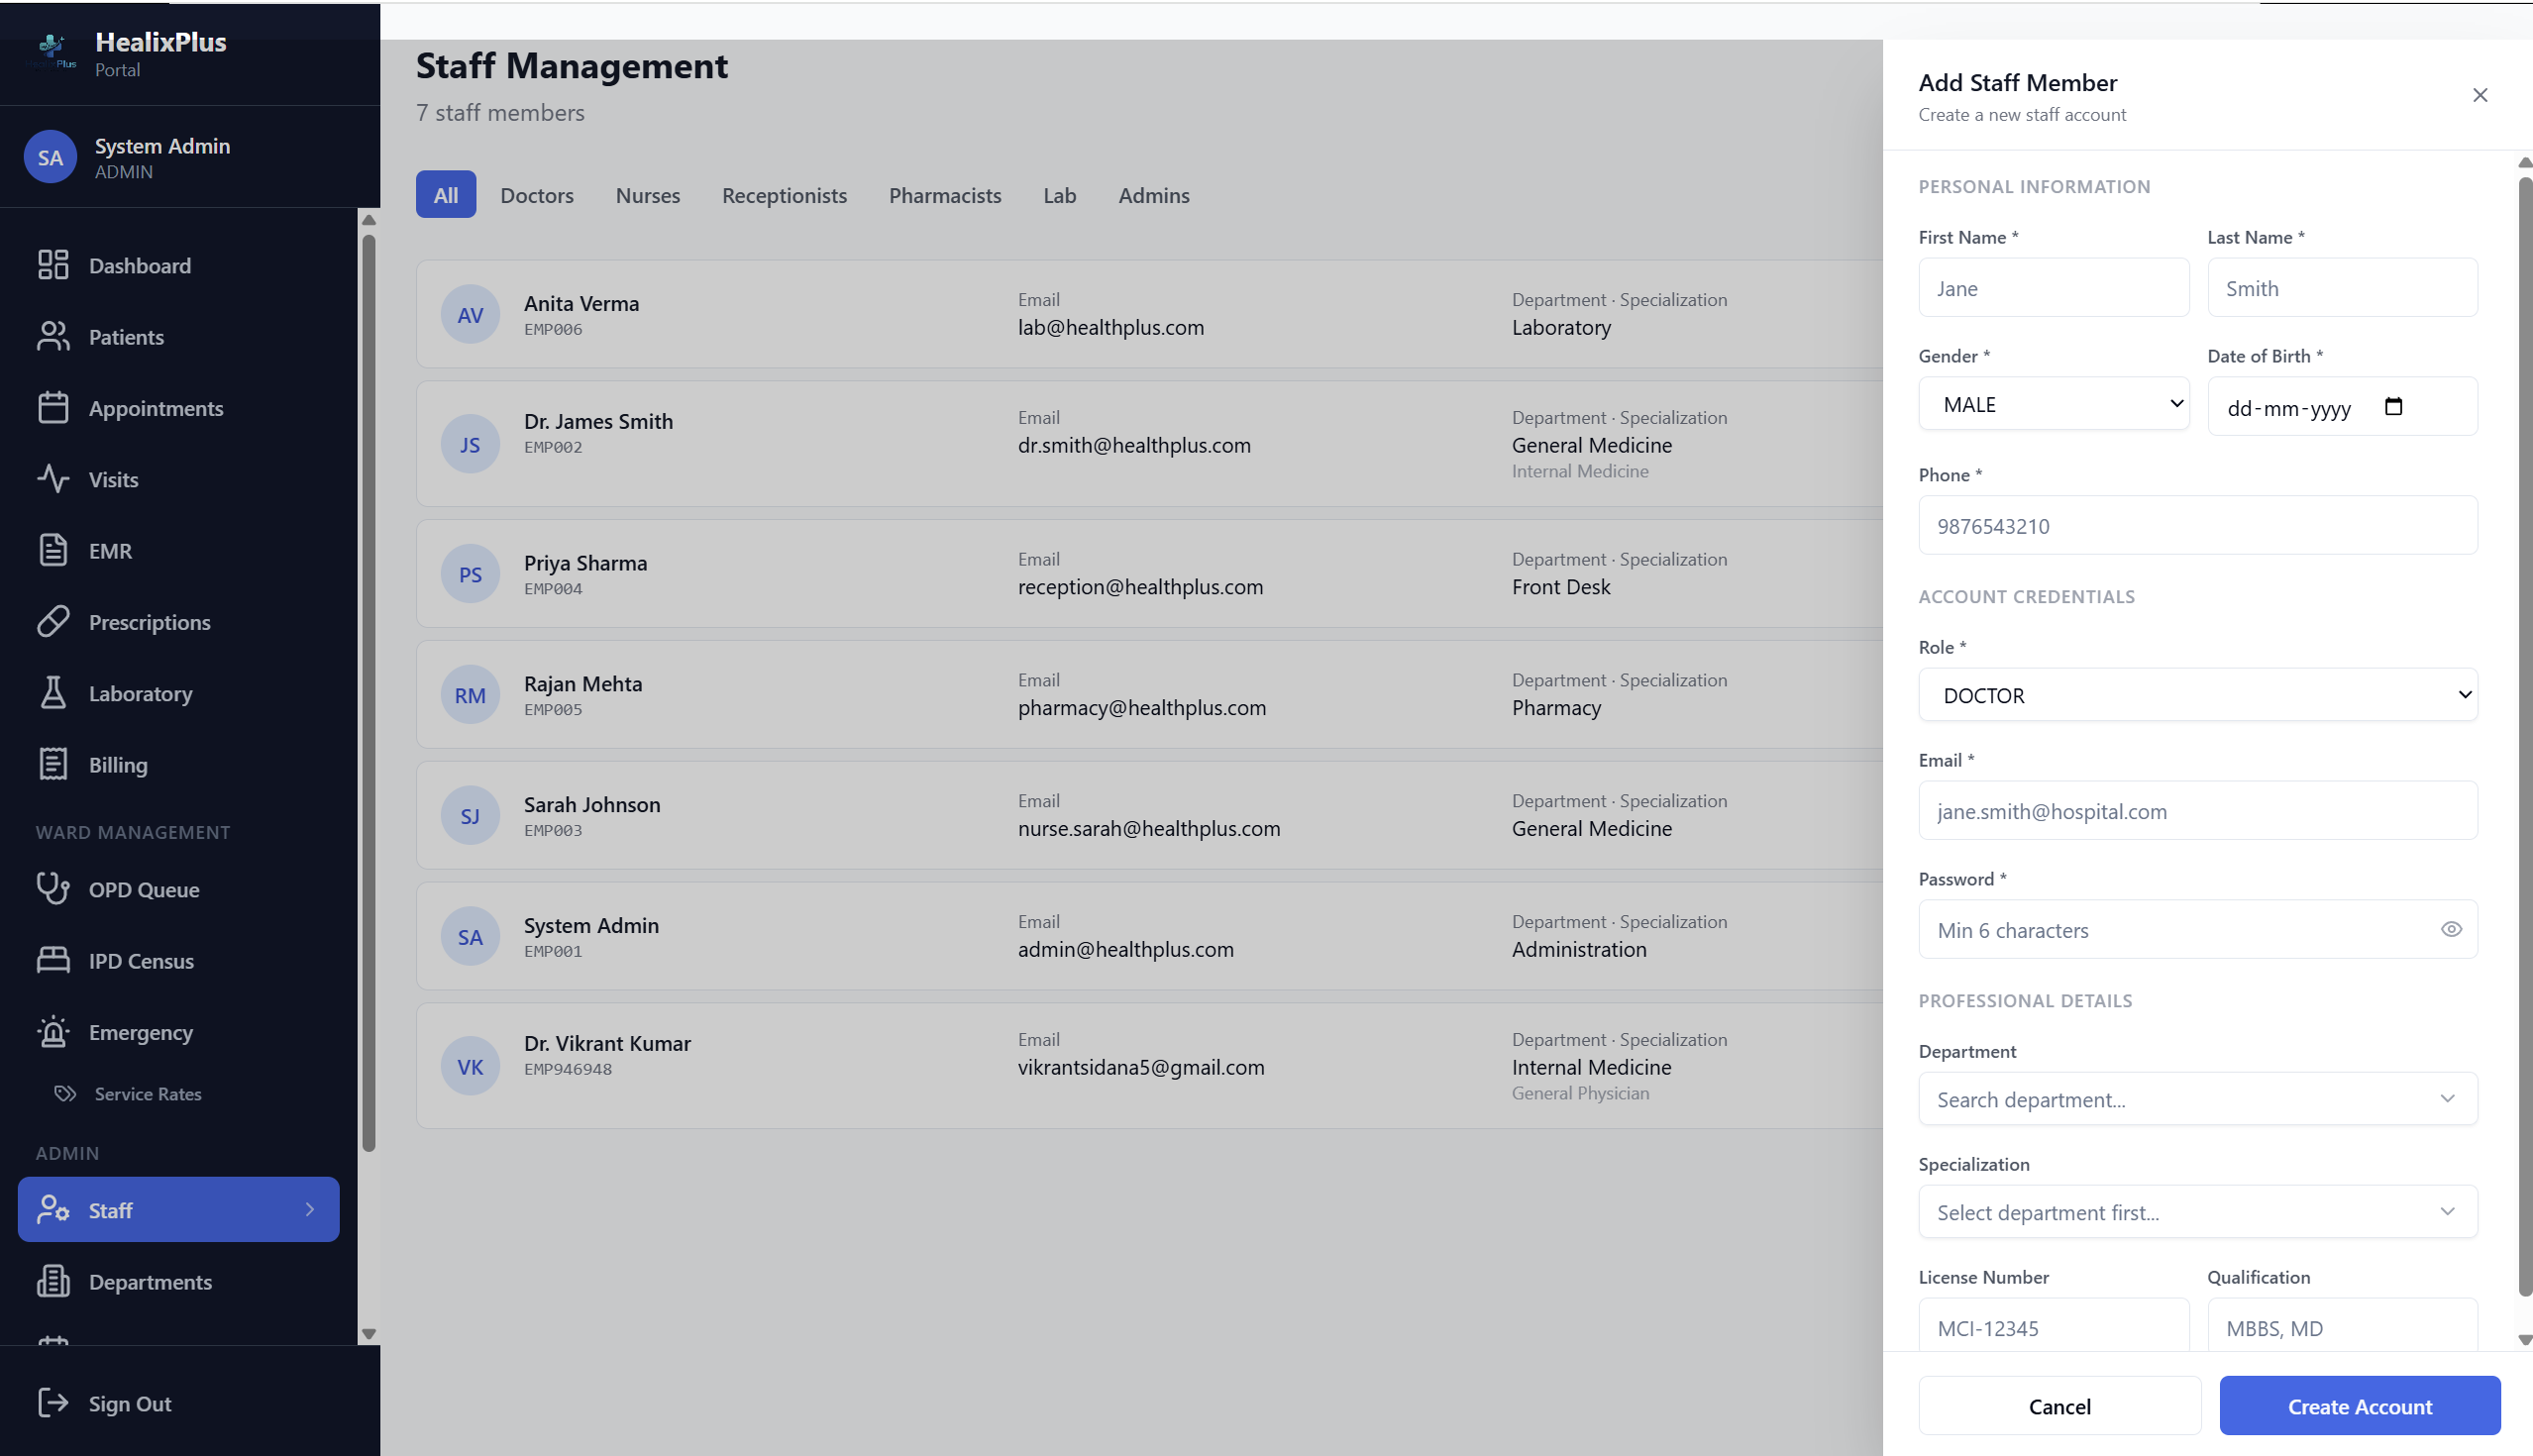
Register Staff & Doctors
The Admin creates accounts for all hospital staff — Doctors, Nurses, Receptionists, Pharmacists, and Lab Technicians. Each staff member gets login credentials, a role, and is linked to their department.
- ✓Staff details: name, employee ID, DOB, gender, phone
- ✓Professional: license number, qualifications, specialisation
- ✓System role assigned: Doctor / Nurse / Receptionist / Pharmacist / Lab Technician
- ✓Credentials generated and shared securely with each staff member
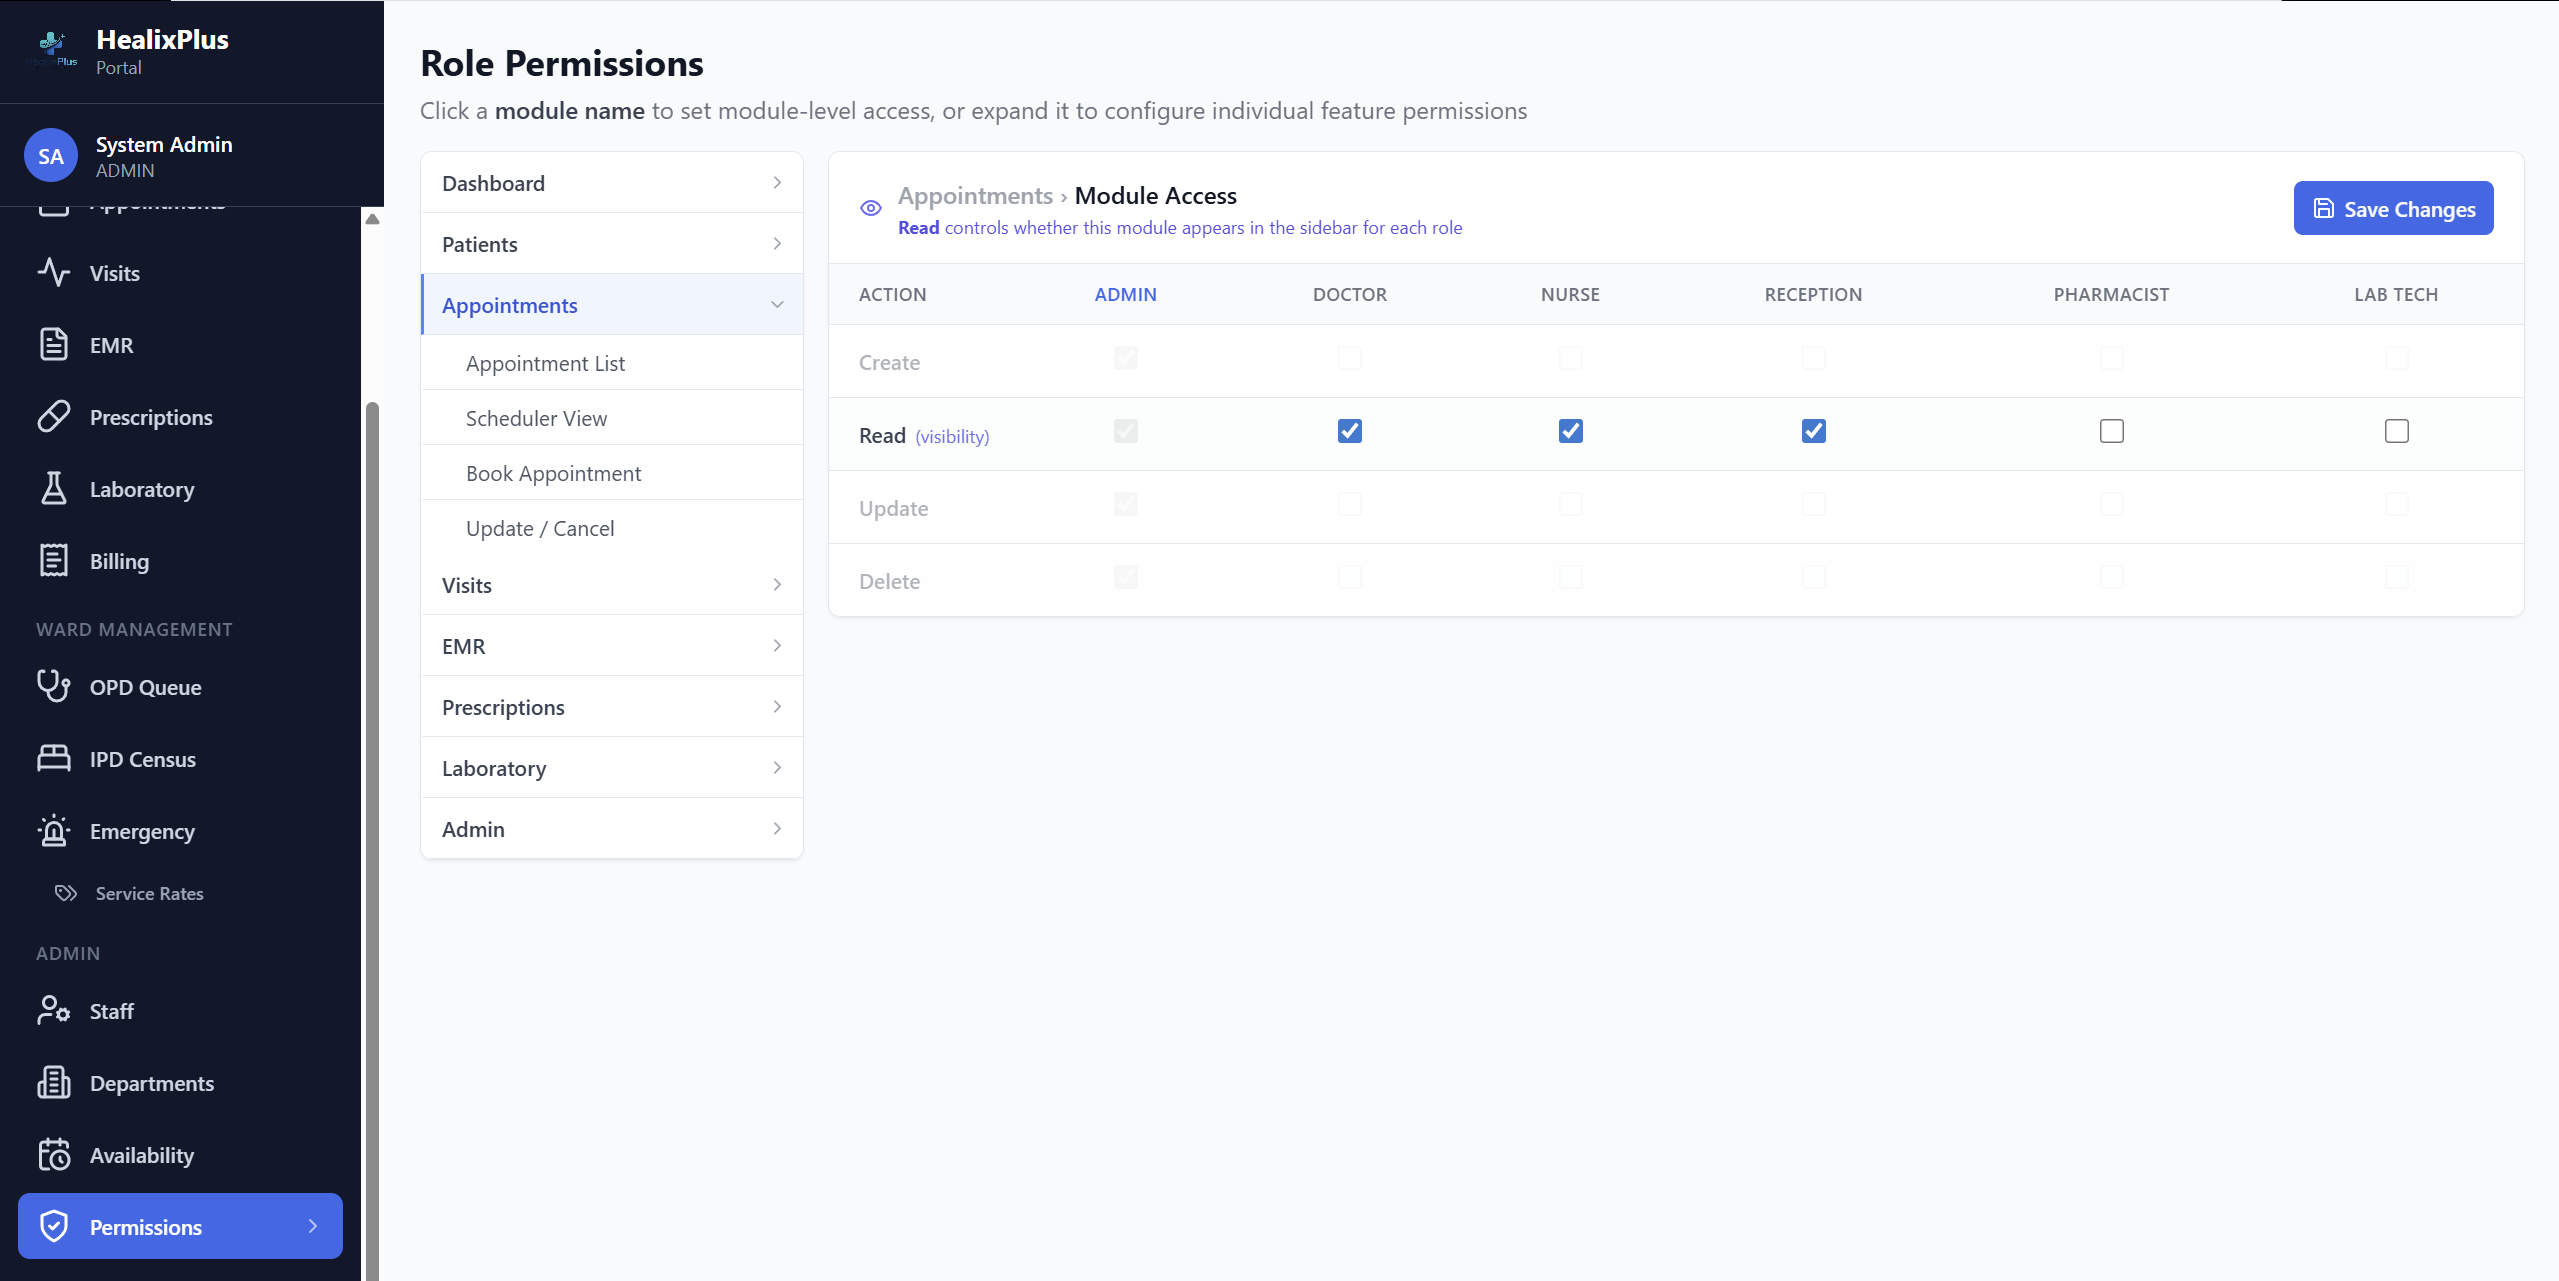
Configure Role-Based Permissions
The Admin sets granular CRUD permissions for every role across every module — no code changes needed. A Nurse can view but not edit billing; a Lab Technician can only access their lab orders.
- ✓Permission matrix: Create / Read / Update / Delete per module per role
- ✓Changes take effect immediately across all active sessions
- ✓Permissions can be tightened or relaxed at any time
Doctors log in and set their availability
Done once per doctor. Takes 5 minutes.
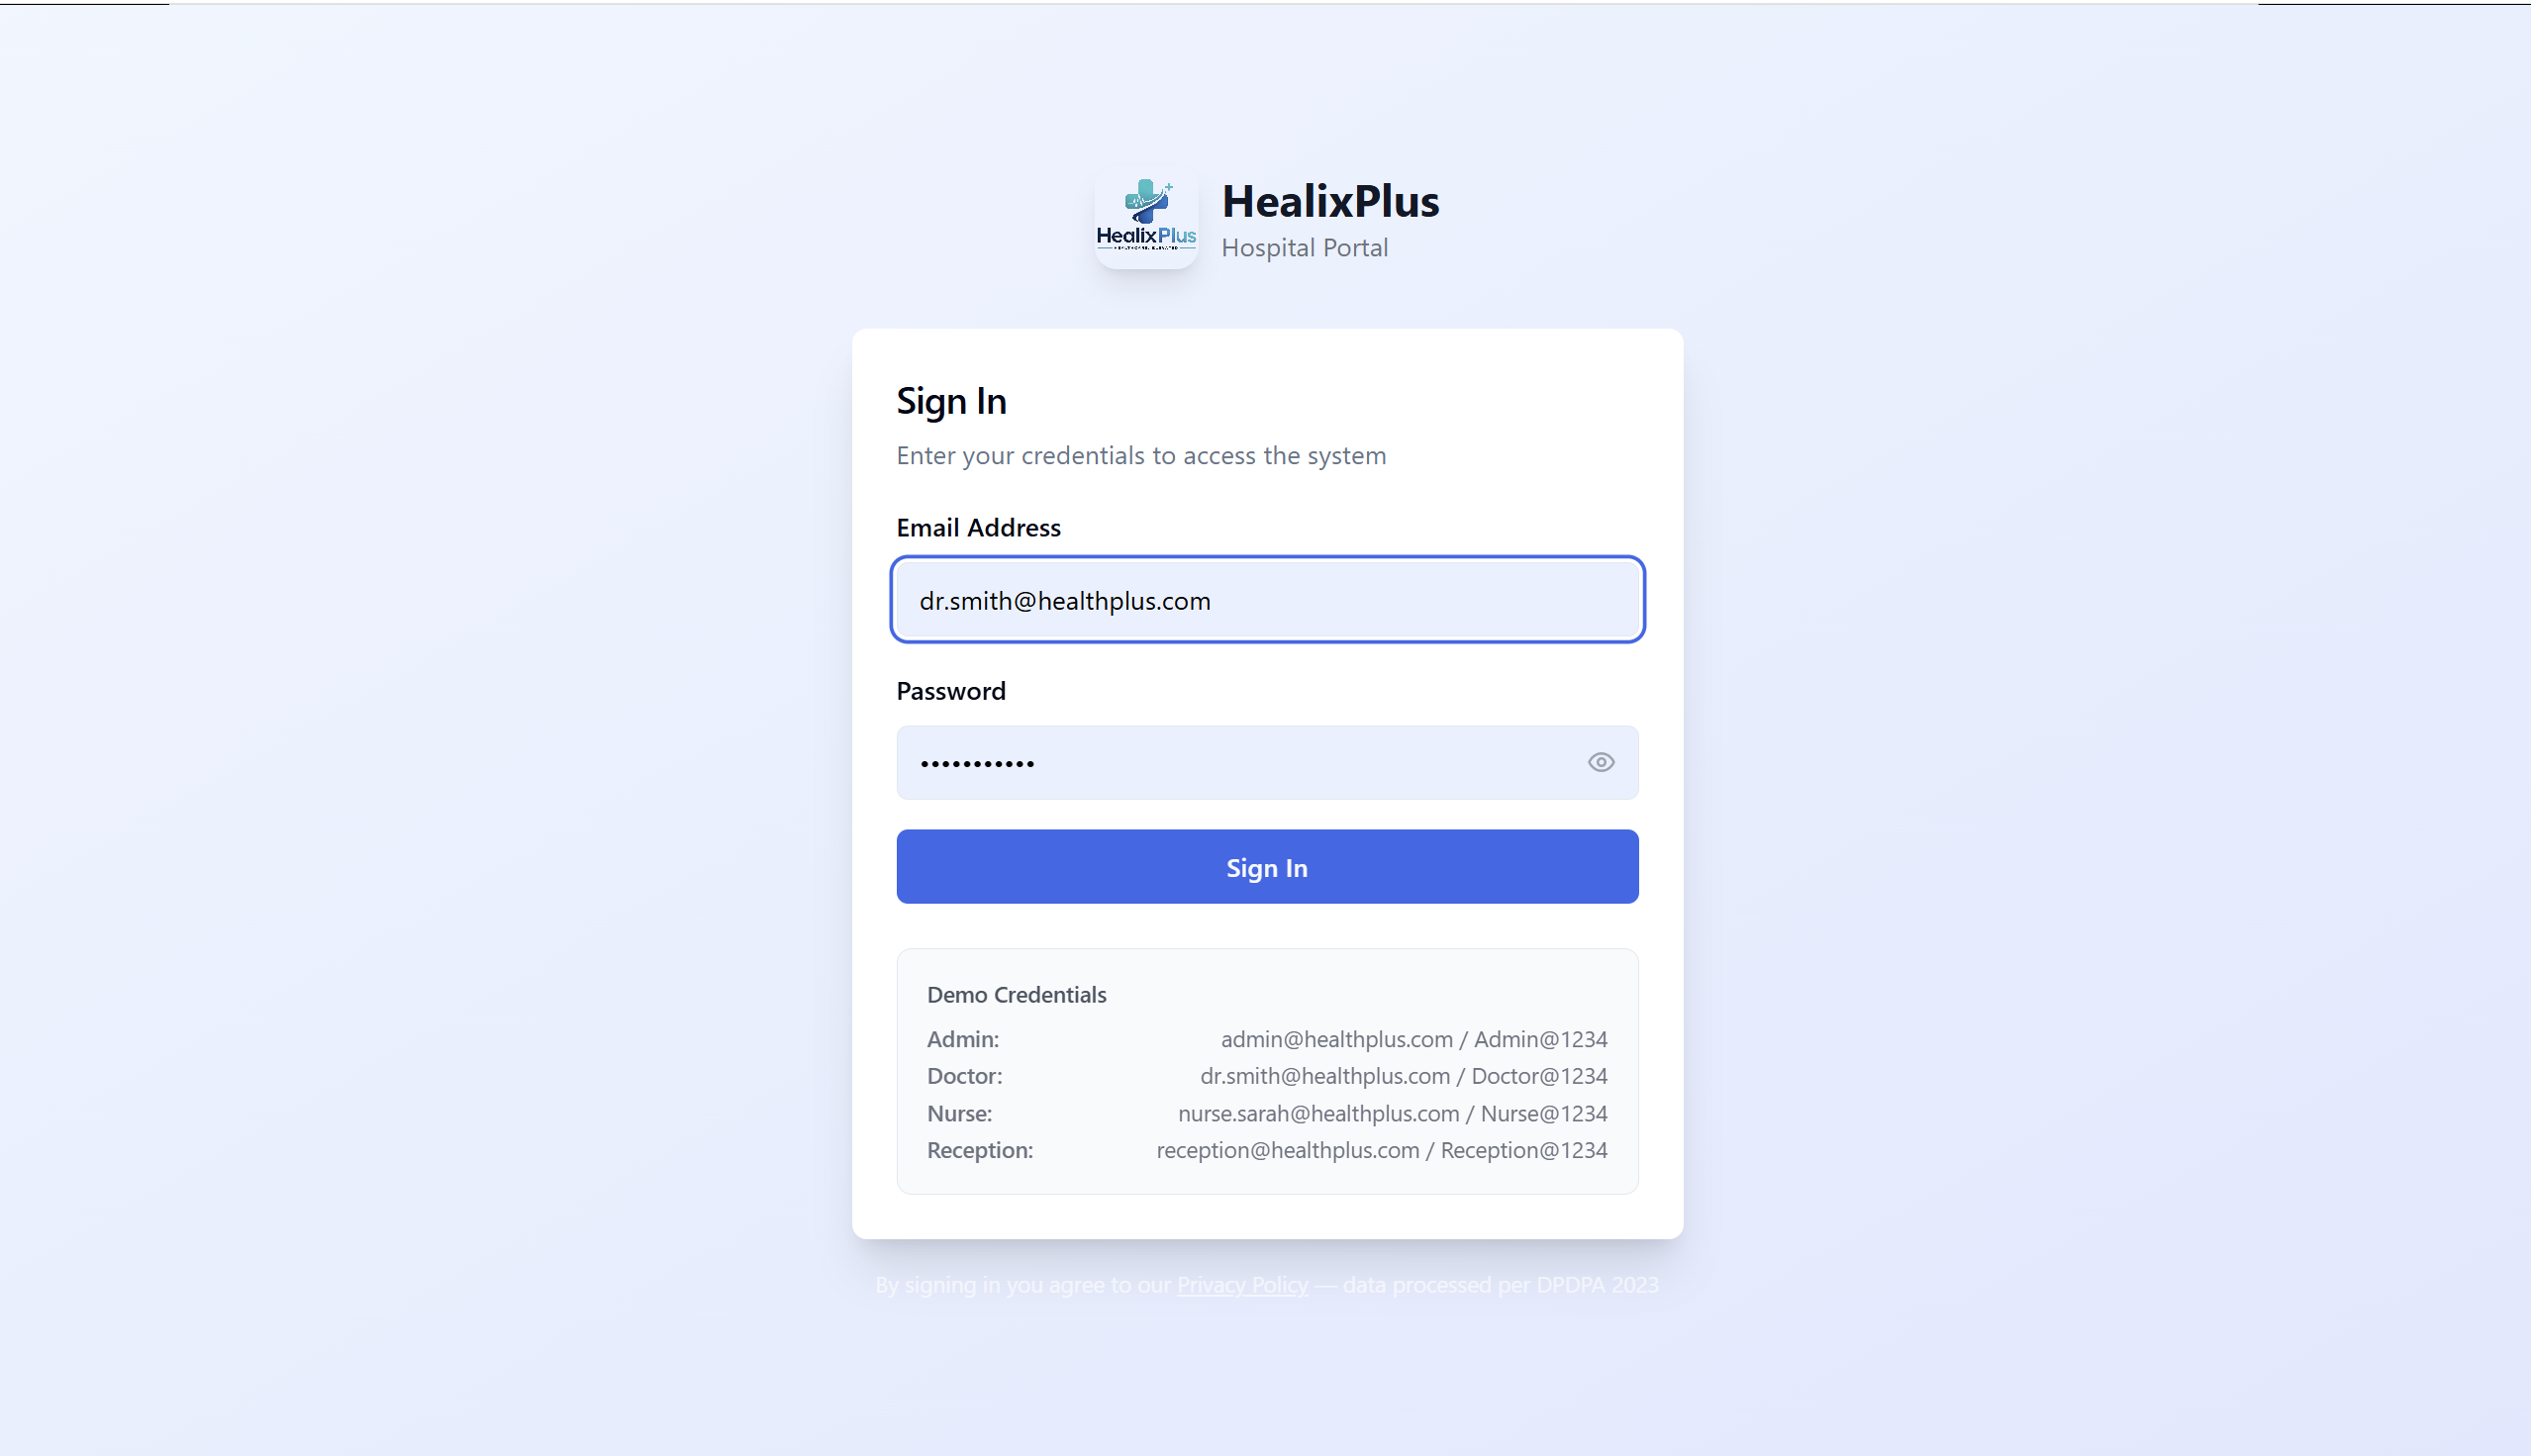
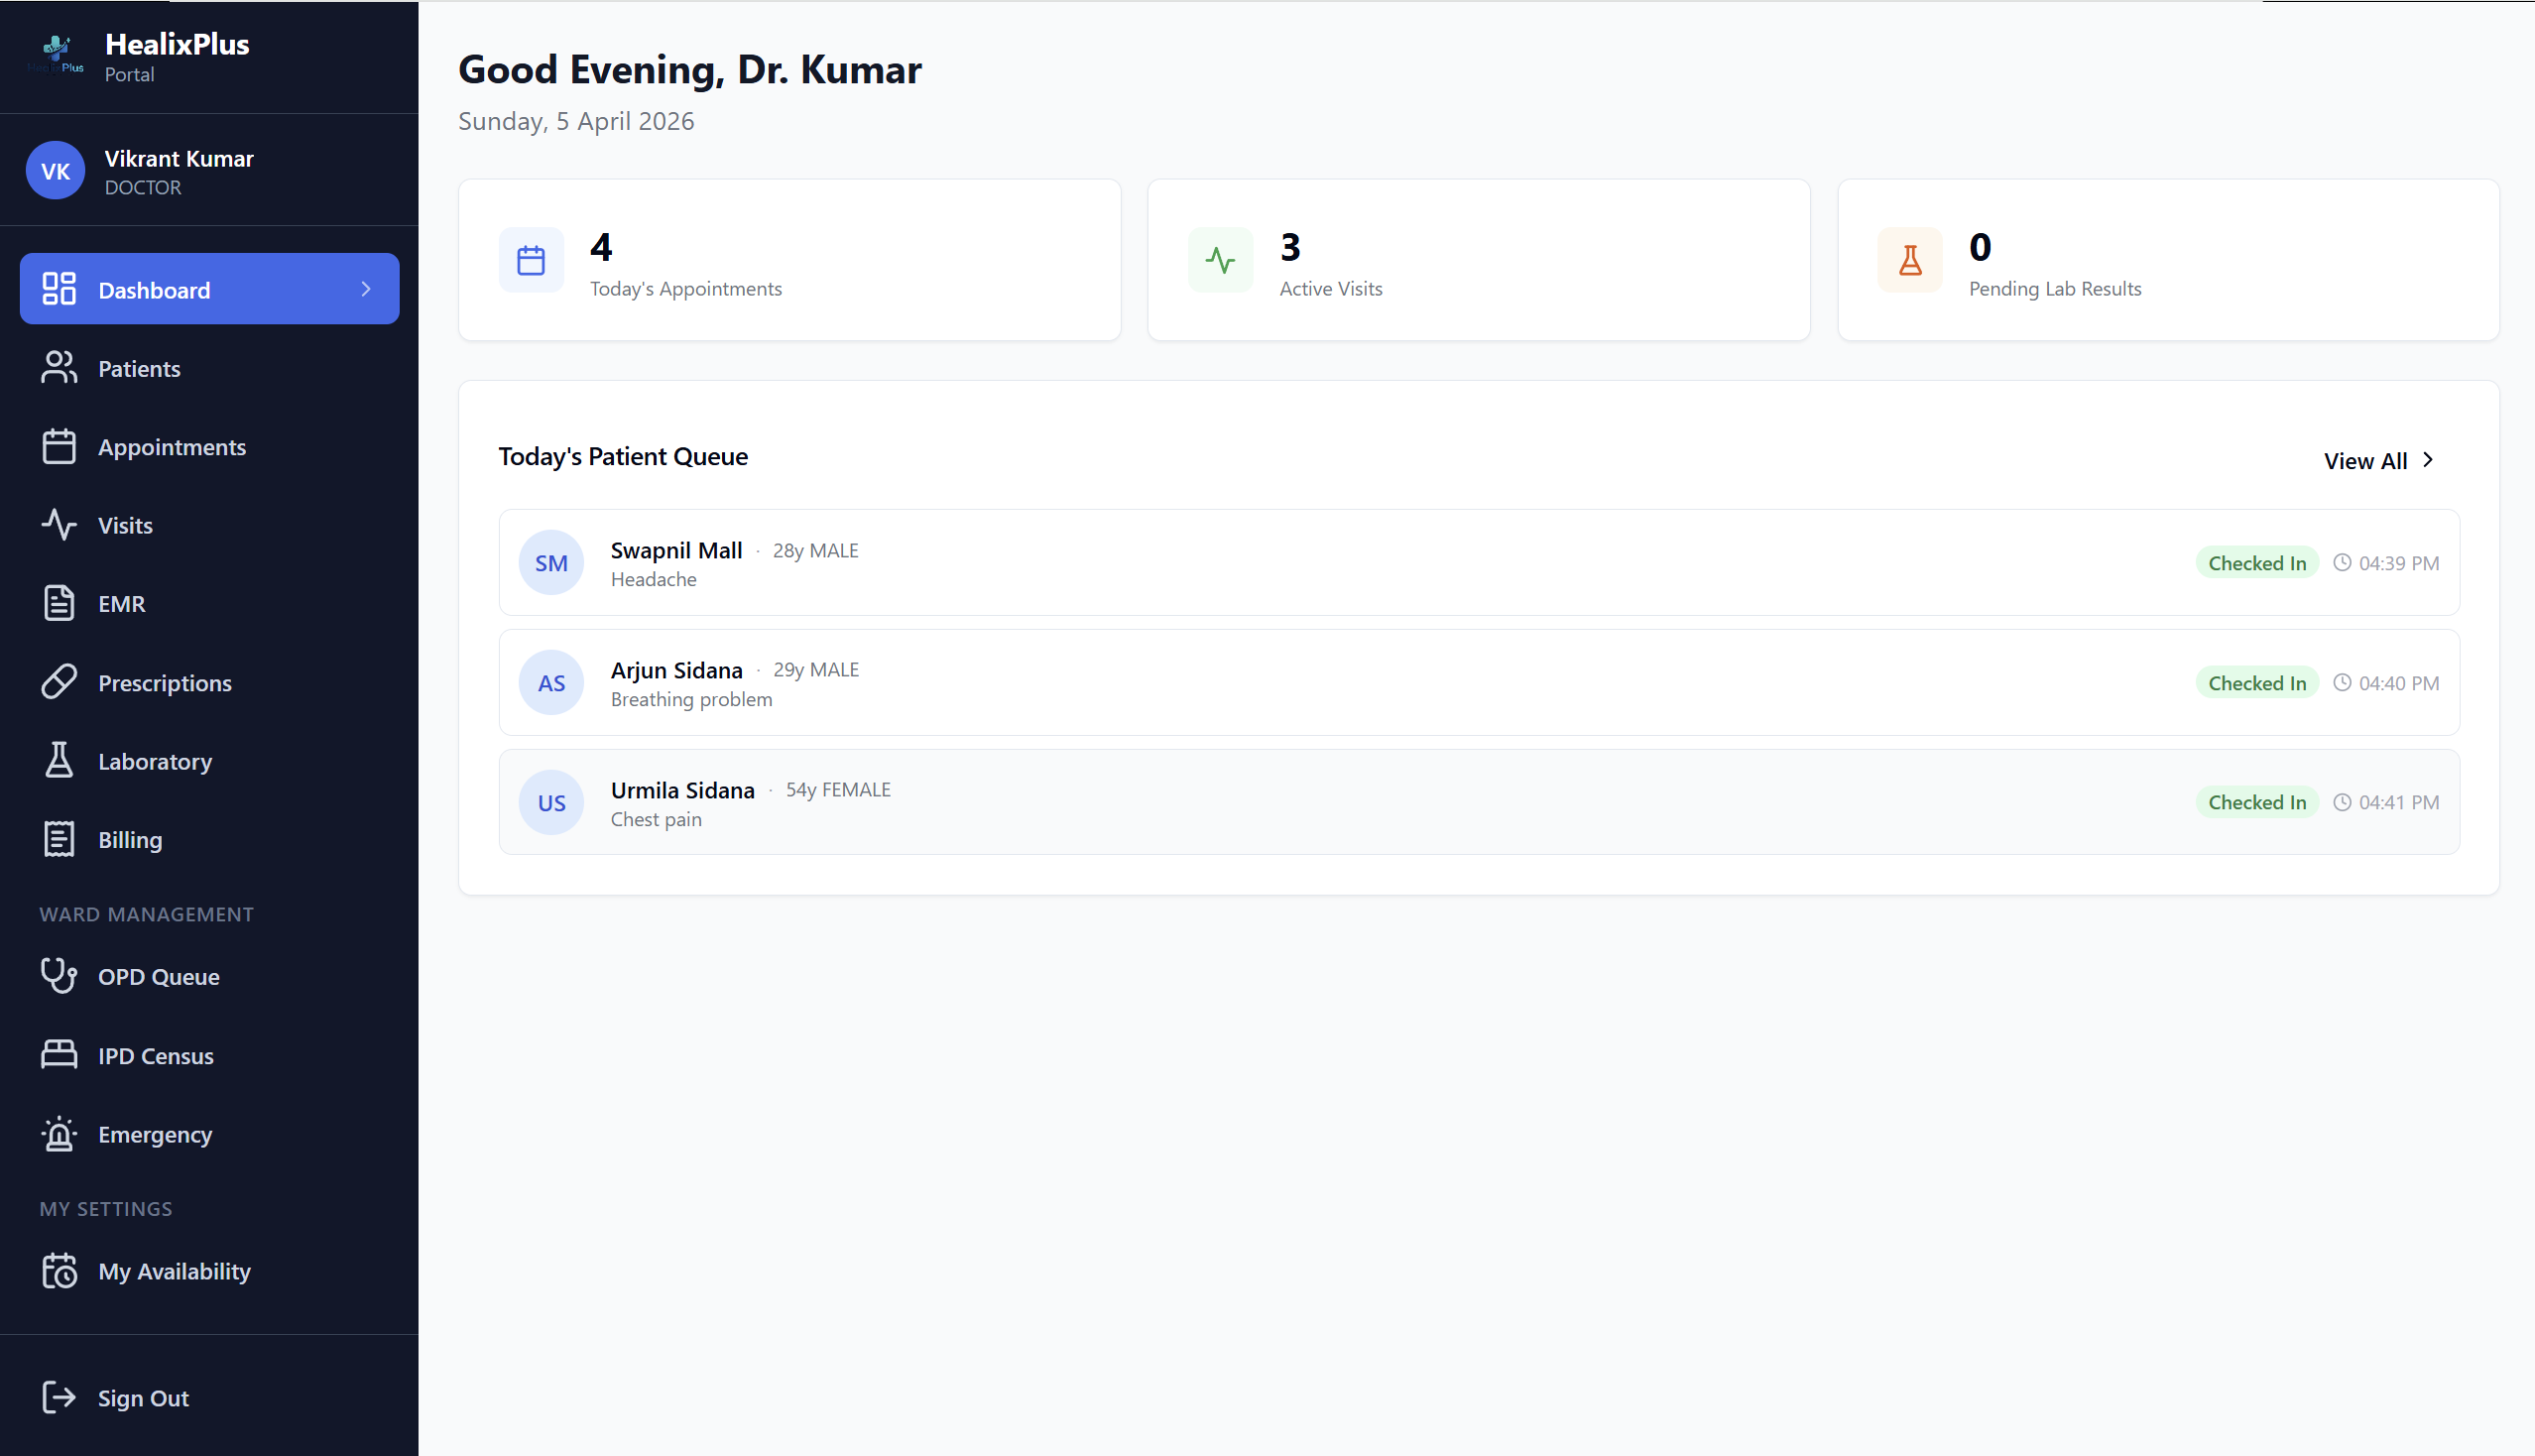
Doctor Login
Each doctor logs in with the credentials created by the Admin. They land on their personal Doctor Dashboard — appointments for the day, pending EMRs, and lab results awaiting review.
- ✓Role-scoped dashboard — only sees their own patients
- ✓Today's appointment list front and centre
- ✓Pending lab results and EMR drafts highlighted
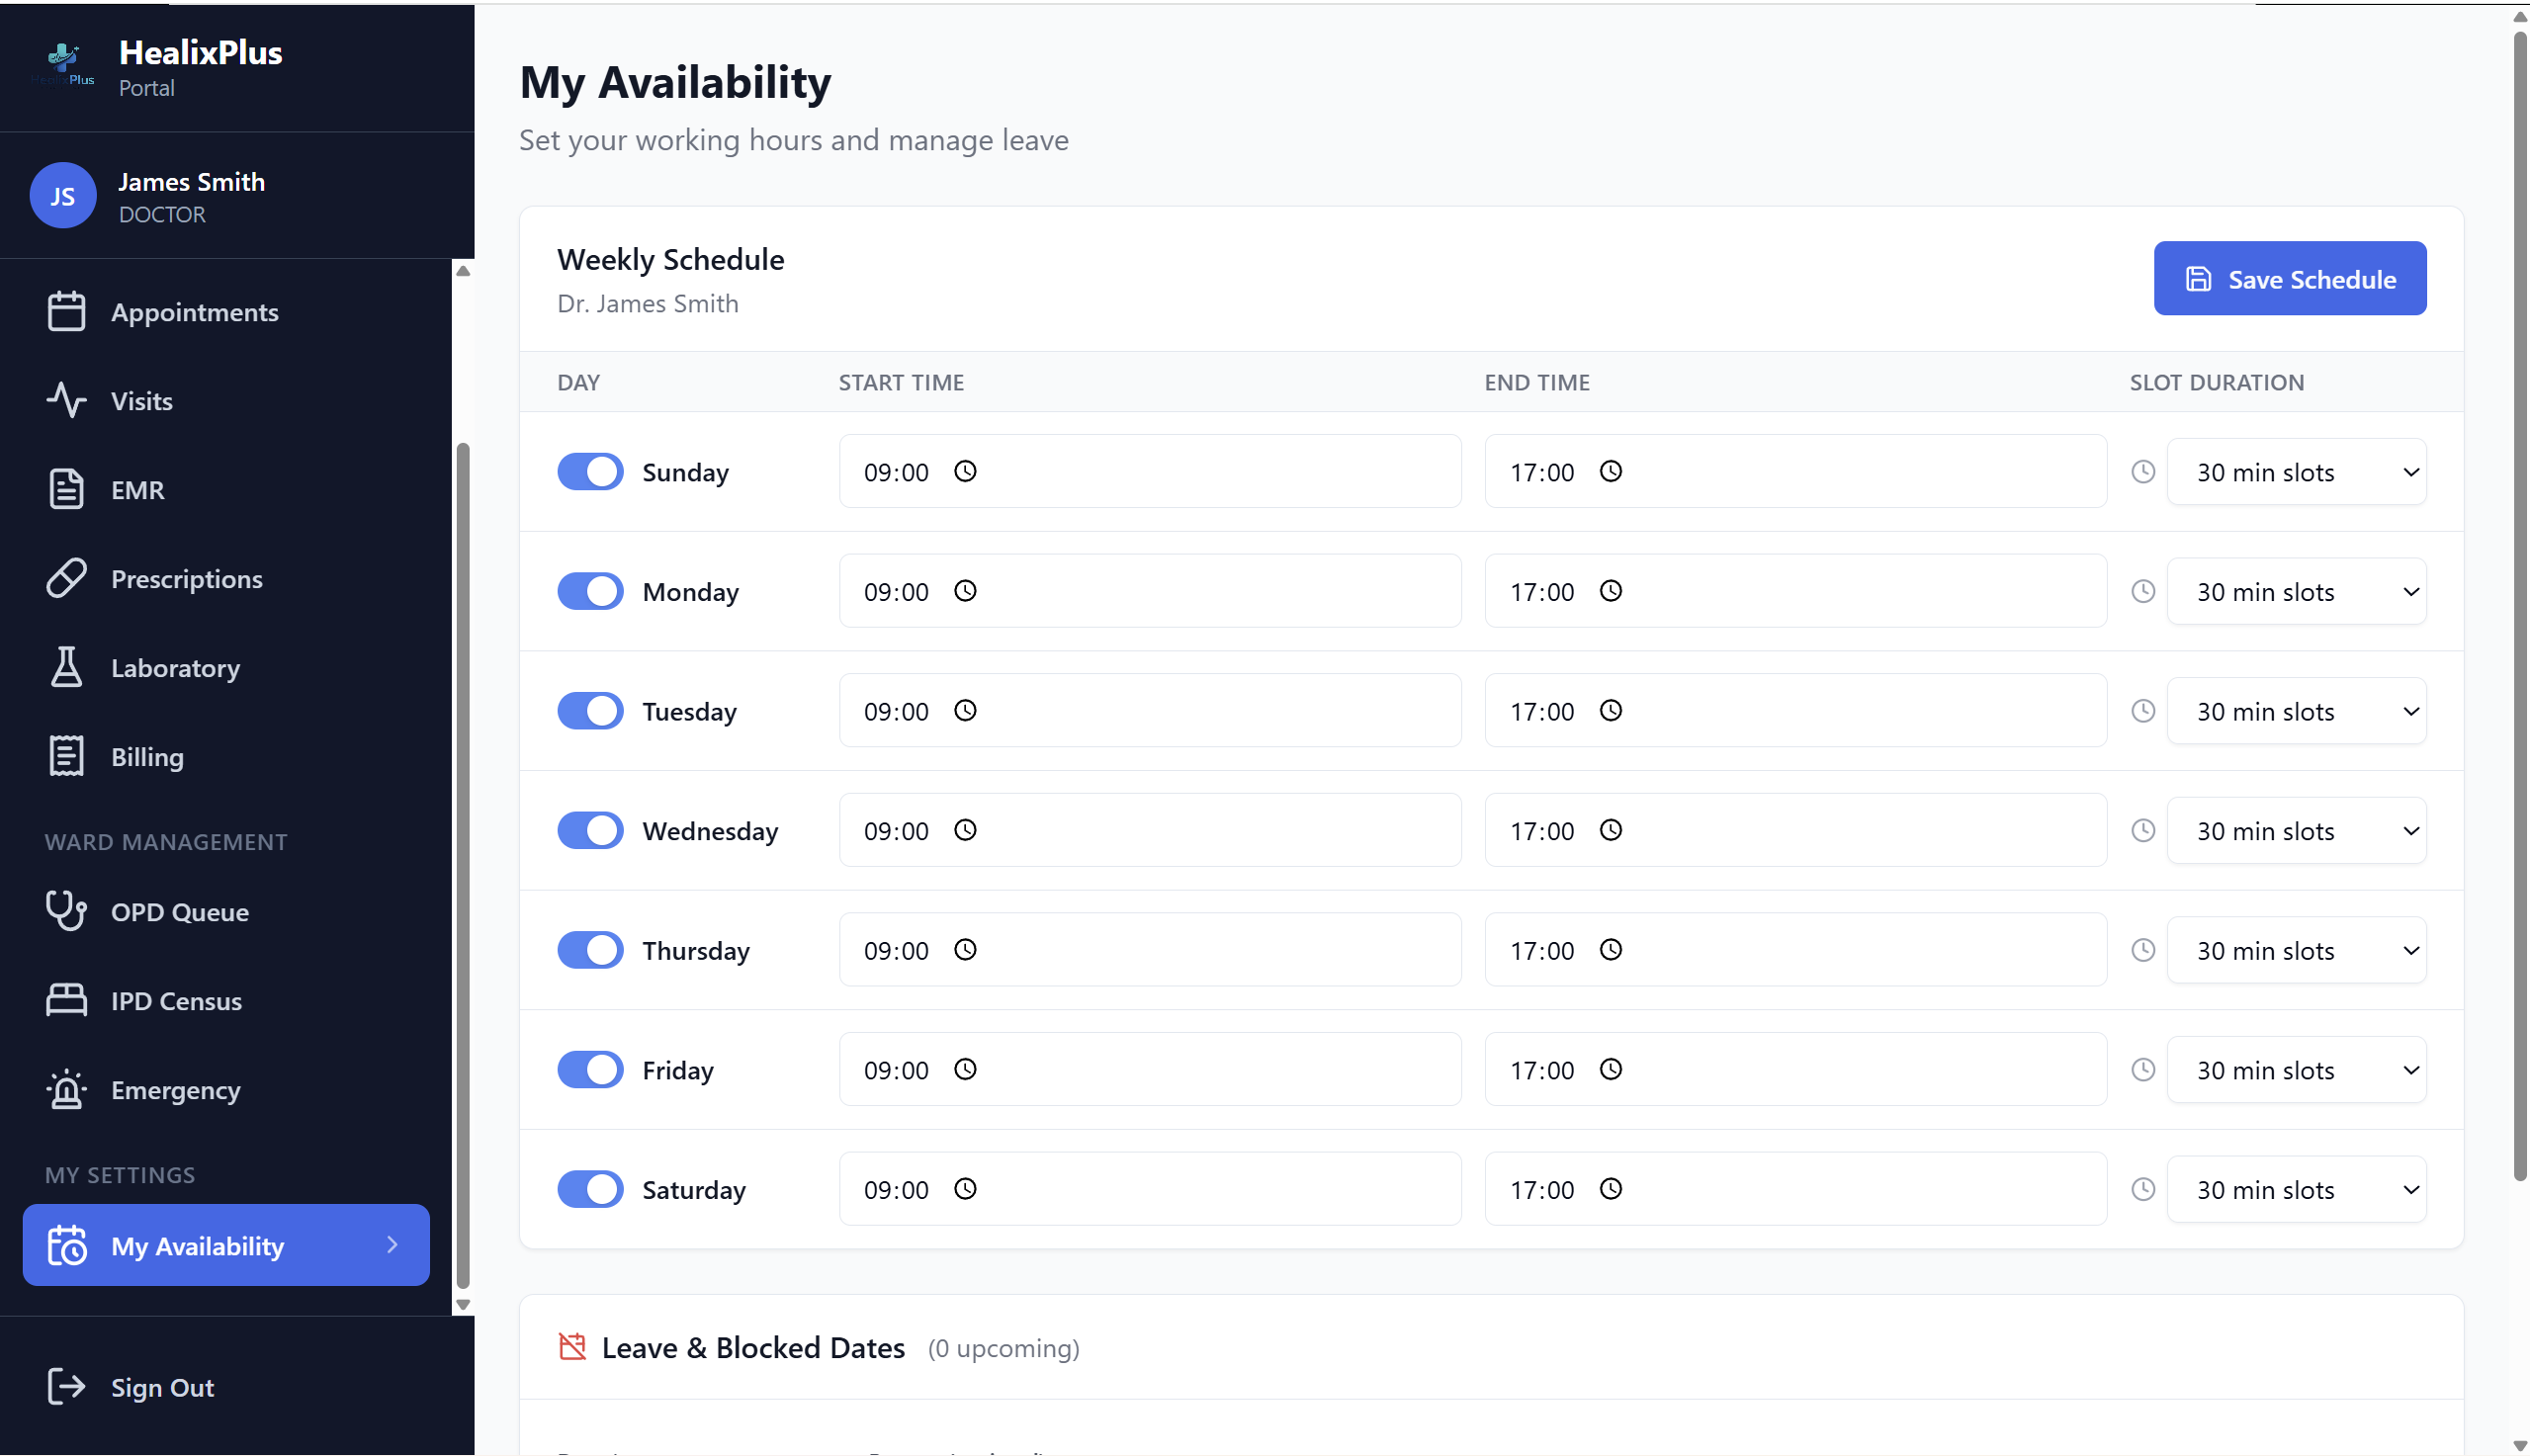
Set Availability
The doctor configures their weekly availability — which days they are available and which time slots are open for bookings. Receptionists and patients (if using online booking) can only book within these slots.
- ✓Set availability by day of the week
- ✓Define time slots per day (e.g., Mon: 9 AM – 1 PM)
- ✓Slots outside availability cannot be booked
- ✓Can be updated at any time
Every patient, every day
Repeated for each patient visit — from registration to discharge and billing.
Receptionist Login
The receptionist logs in and sees the front-desk dashboard — today's OPD queue, scheduled appointments, and a quick-register button for walk-in patients.
- ✓Front-desk view: appointments, queue, and billing summary
- ✓One-click patient registration for walk-ins
- ✓Appointment calendar with doctor availability
Register New Patient
The receptionist creates a new patient record. The system auto-generates a unique Medical Record Number (MRN). Demographics, insurance details, emergency contacts, and DPDPA 2023 consent are captured.
- ✓Auto-generated MRN (unique identifier)
- ✓Demographics: name, DOB, gender, blood group, address
- ✓Insurance: provider and policy number
- ✓Emergency contact details
- ✓Digital consent logged as per DPDPA 2023

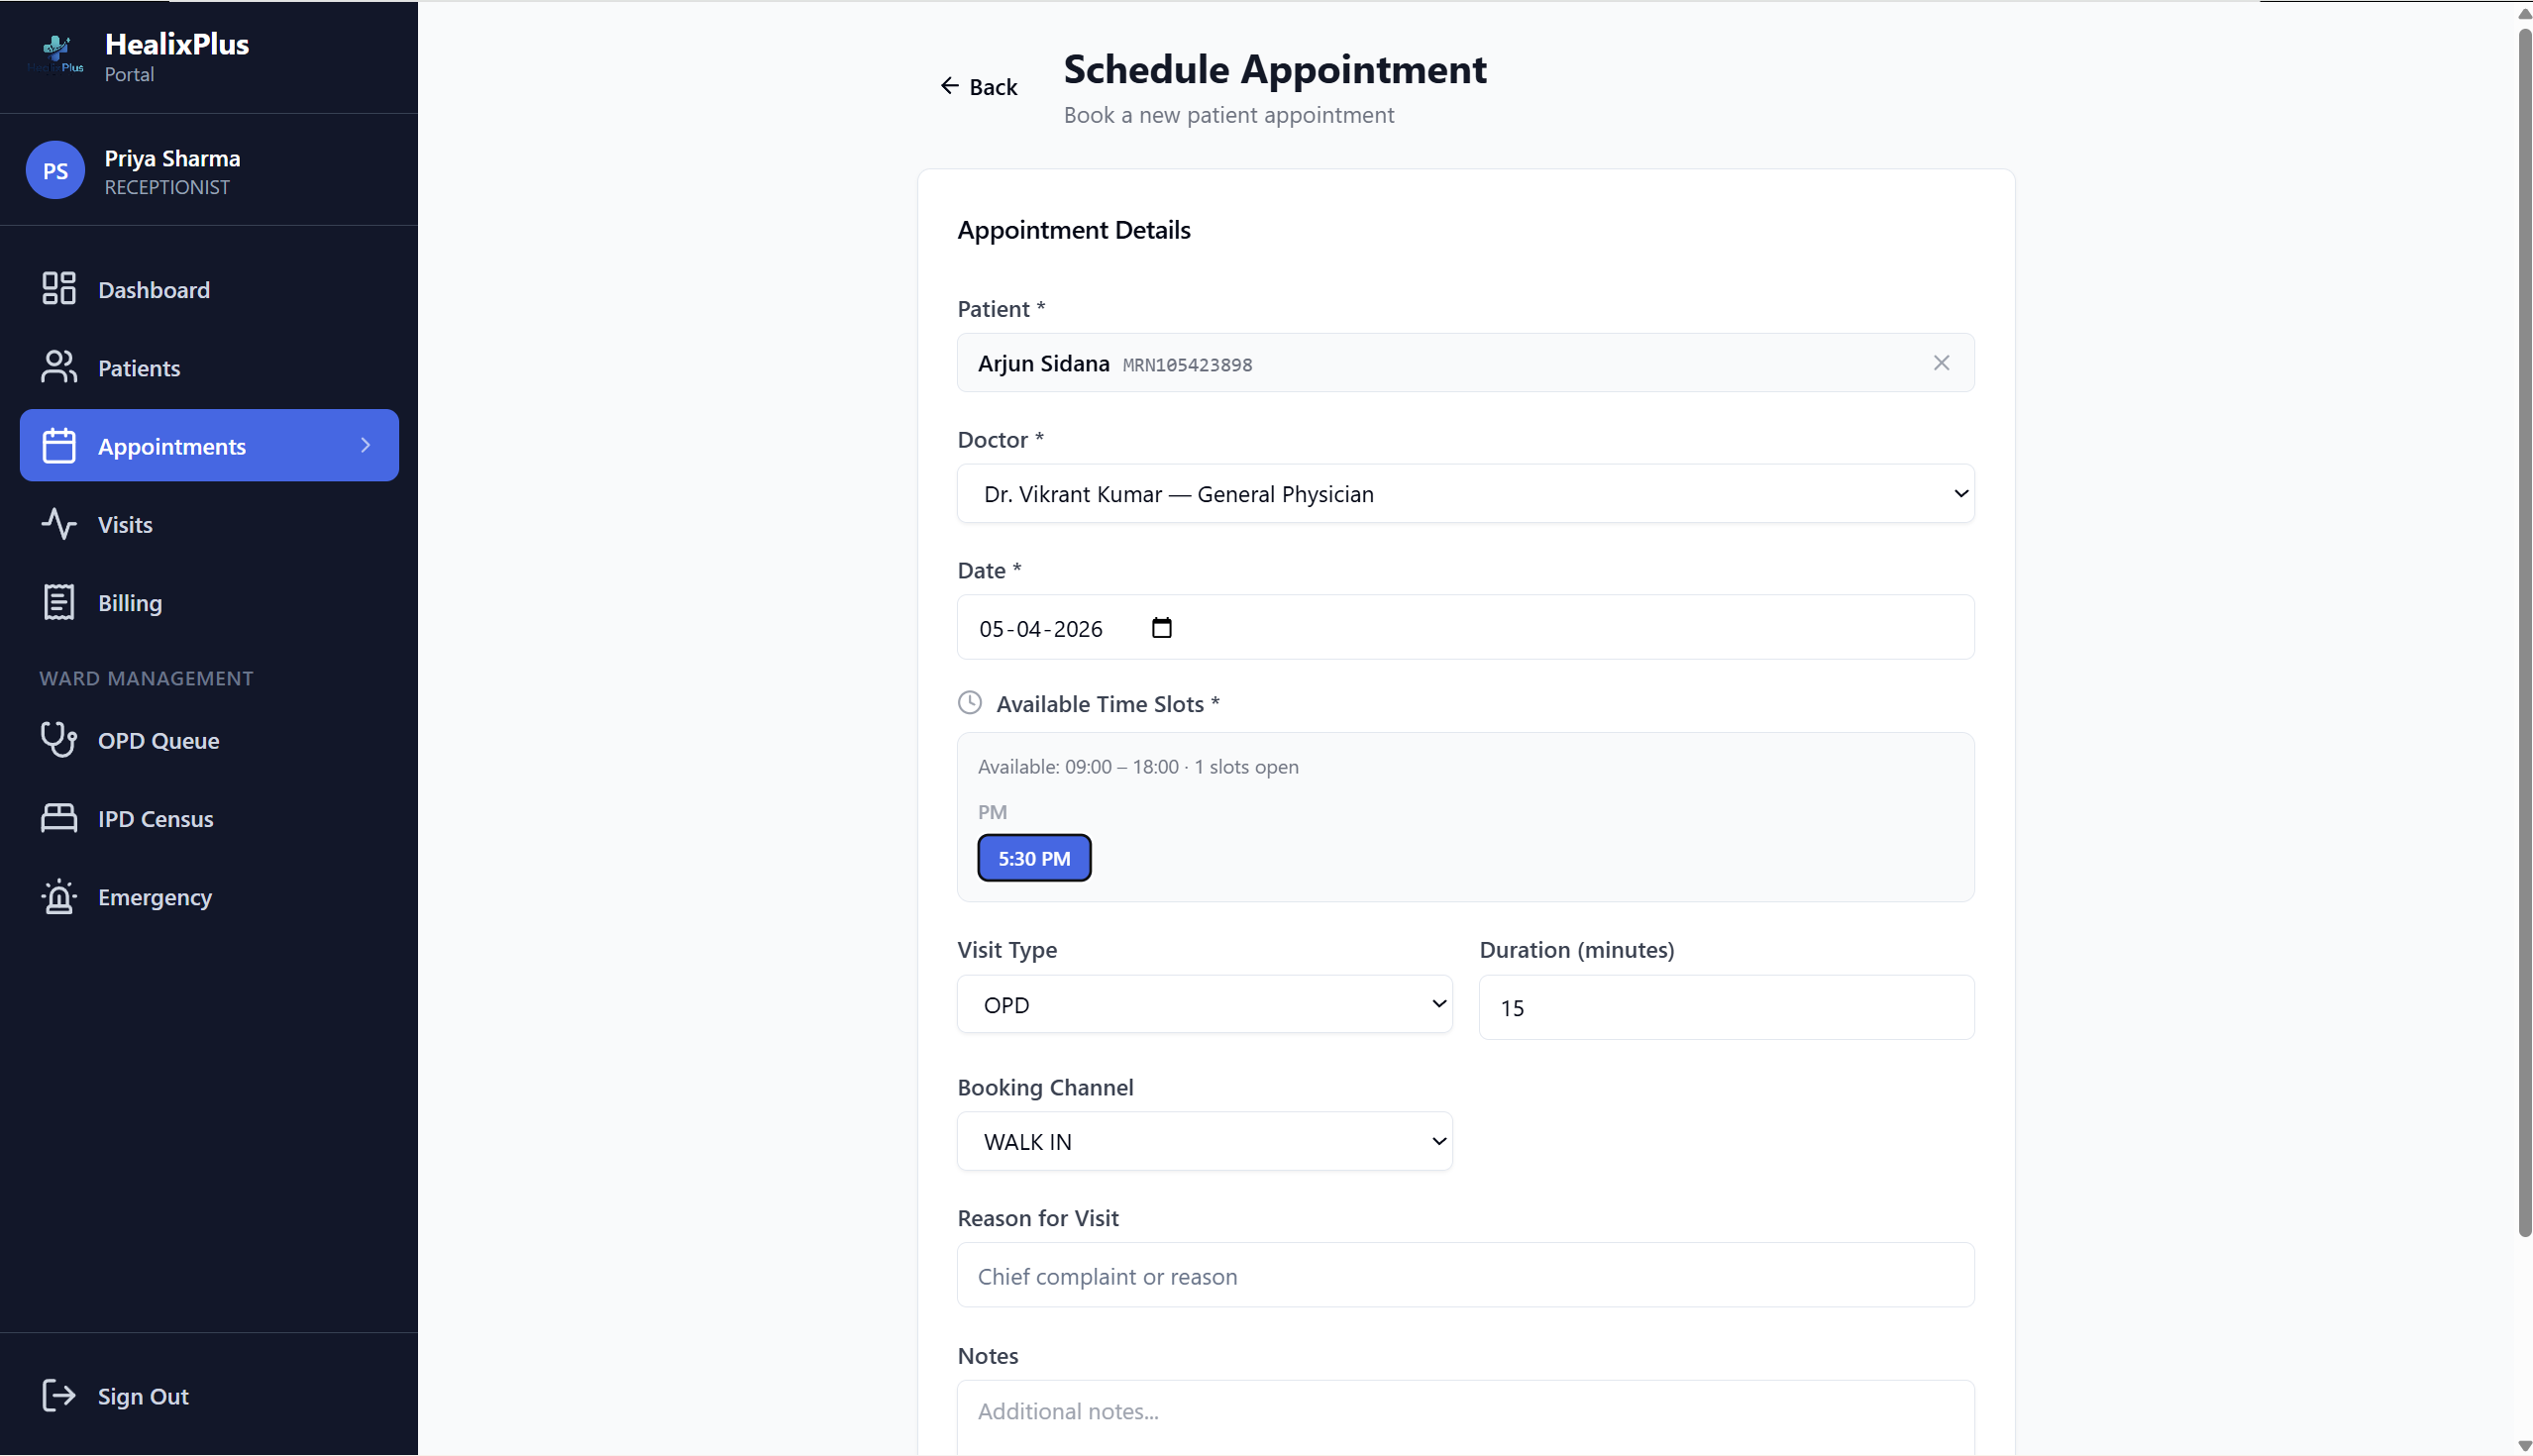
Schedule Appointment
The receptionist books an appointment — selecting the doctor, visit type, and time slot from the doctor's available slots. The system confirms the booking and adds it to the OPD queue.
- ✓Visit types: OPD, IPD, Emergency, Telemedicine, Follow-up, Procedure
- ✓Only available doctor slots are shown
- ✓Booking channels: Walk-in, Phone, Online, App, Referral
- ✓Patient receives confirmation; appointment appears in doctor's calendar
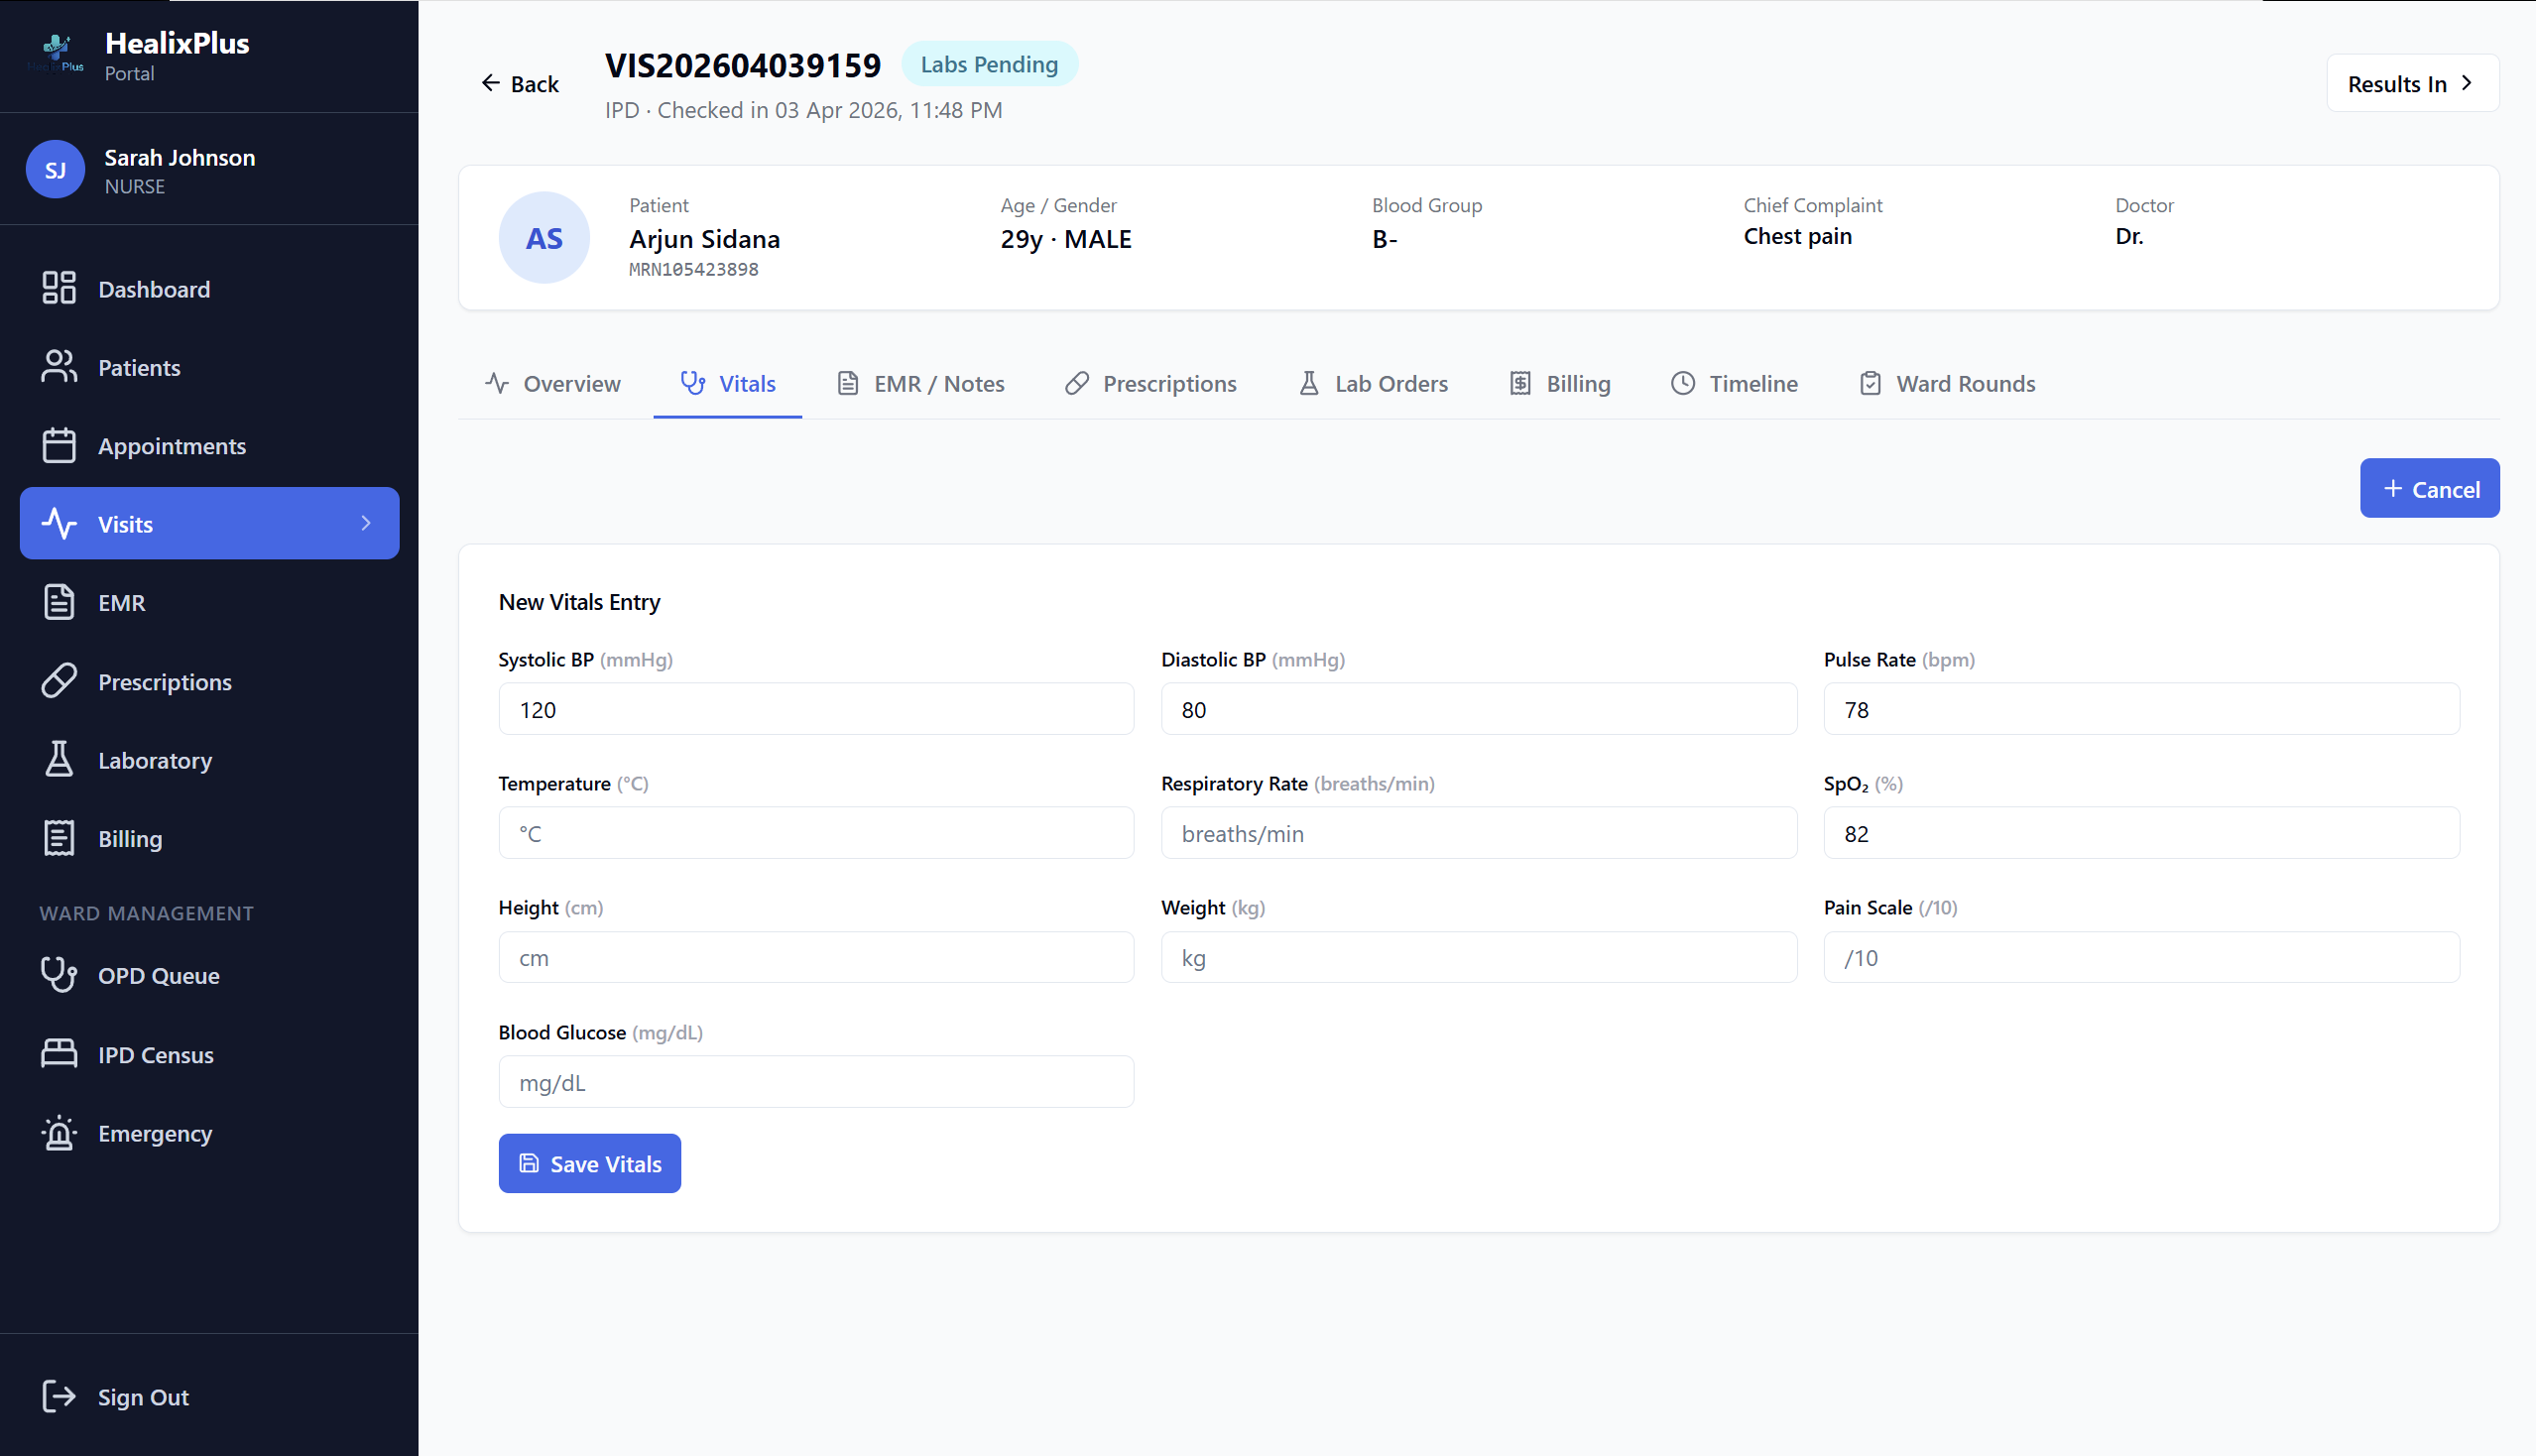
Patient Check-in & Vitals
When the patient arrives, the nurse checks them in and records vital signs. All readings are saved with a timestamp and are immediately visible to the doctor.
- ✓Check-in moves patient to 'Checked In' status
- ✓Vitals recorded: Temp, BP (Sys/Dia), Pulse, RR, O2 Sat
- ✓Height, Weight, BMI (auto-calculated), Pain Scale, Blood Glucose
- ✓Full vital signs history maintained per visit
OPD Queue Management
The nurse moves the patient through the OPD queue. Emergency patients are triaged by priority level (P1–P4). The real-time queue is visible to all roles with appropriate permissions.
- ✓Queue stages: Checked-In → Triage → Waiting for Doctor
- ✓Emergency triage by priority: P1 Immediate, P2 Urgent, P3 Less Urgent, P4 Non-urgent
- ✓Live queue visible to reception, nurses, and doctors
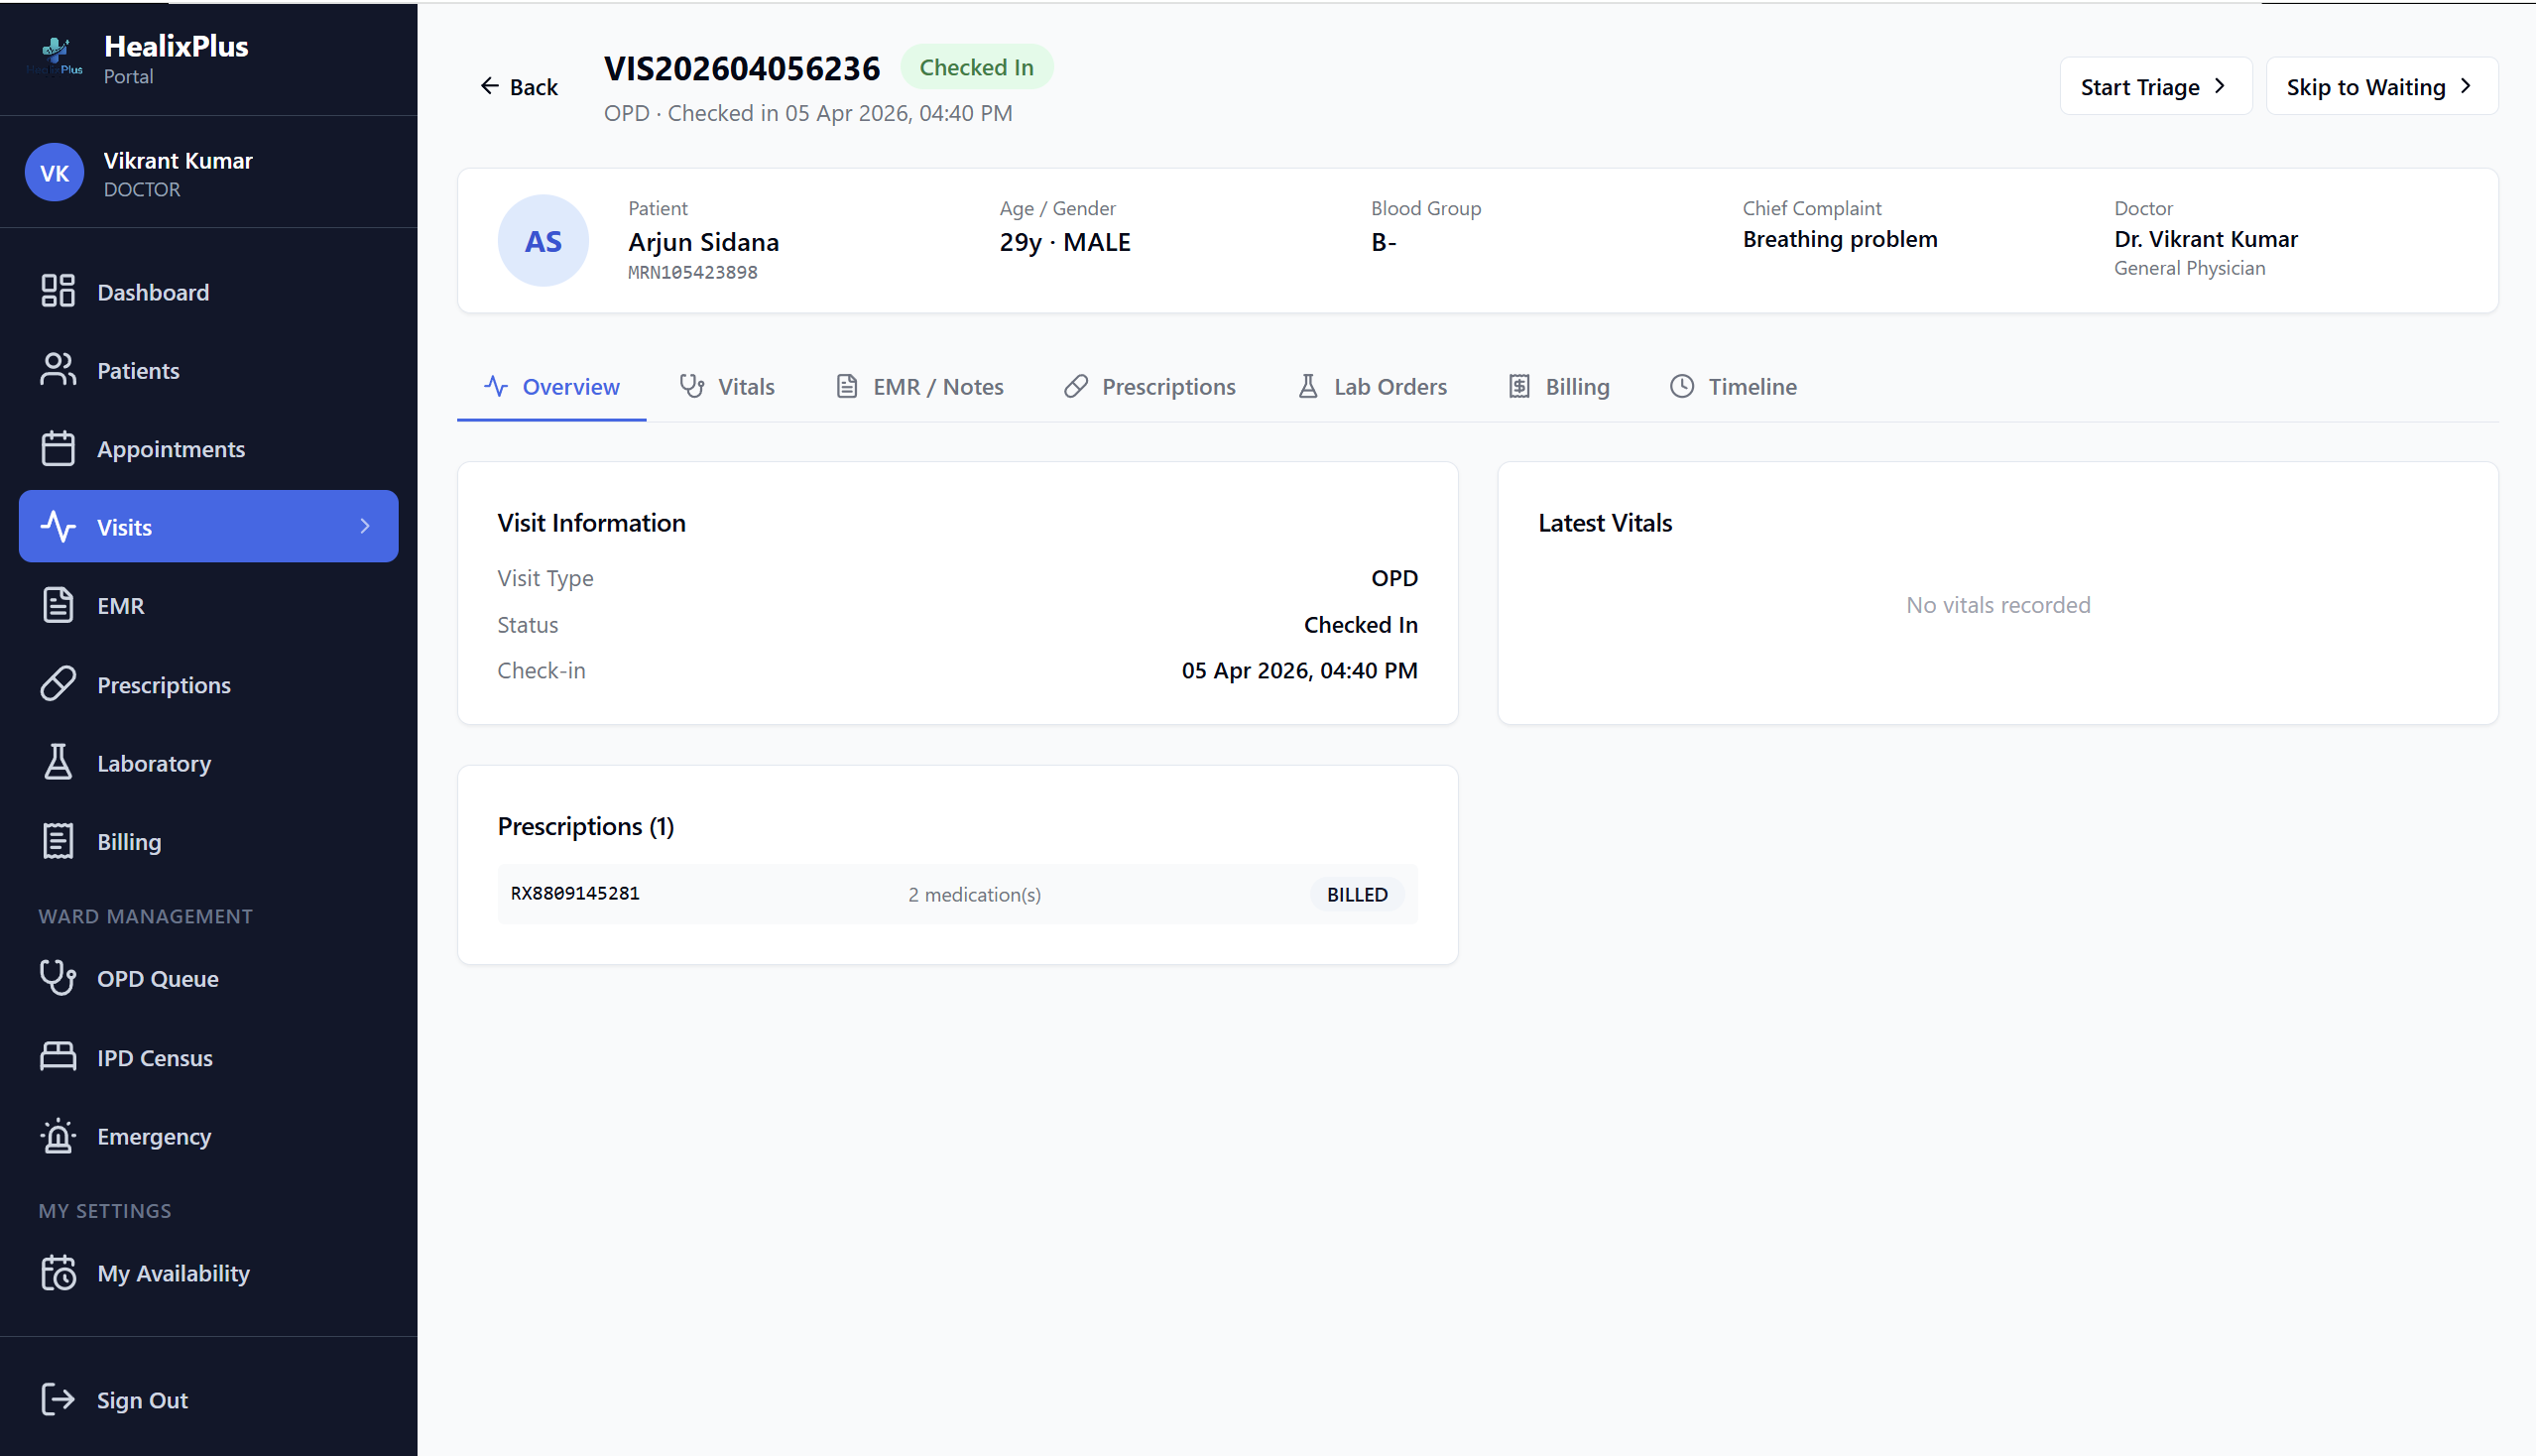
Open Visit & Review History
The doctor opens the patient's visit from their dashboard. They review vitals just recorded, the patient's allergy list, chronic conditions, past surgeries, and full medical history before consulting.
- ✓Visit status moves to 'With Doctor' automatically
- ✓Complete allergy list with severity levels visible
- ✓Past visits, EMRs, prescriptions, and lab history accessible
- ✓Chronic conditions and family history at a glance
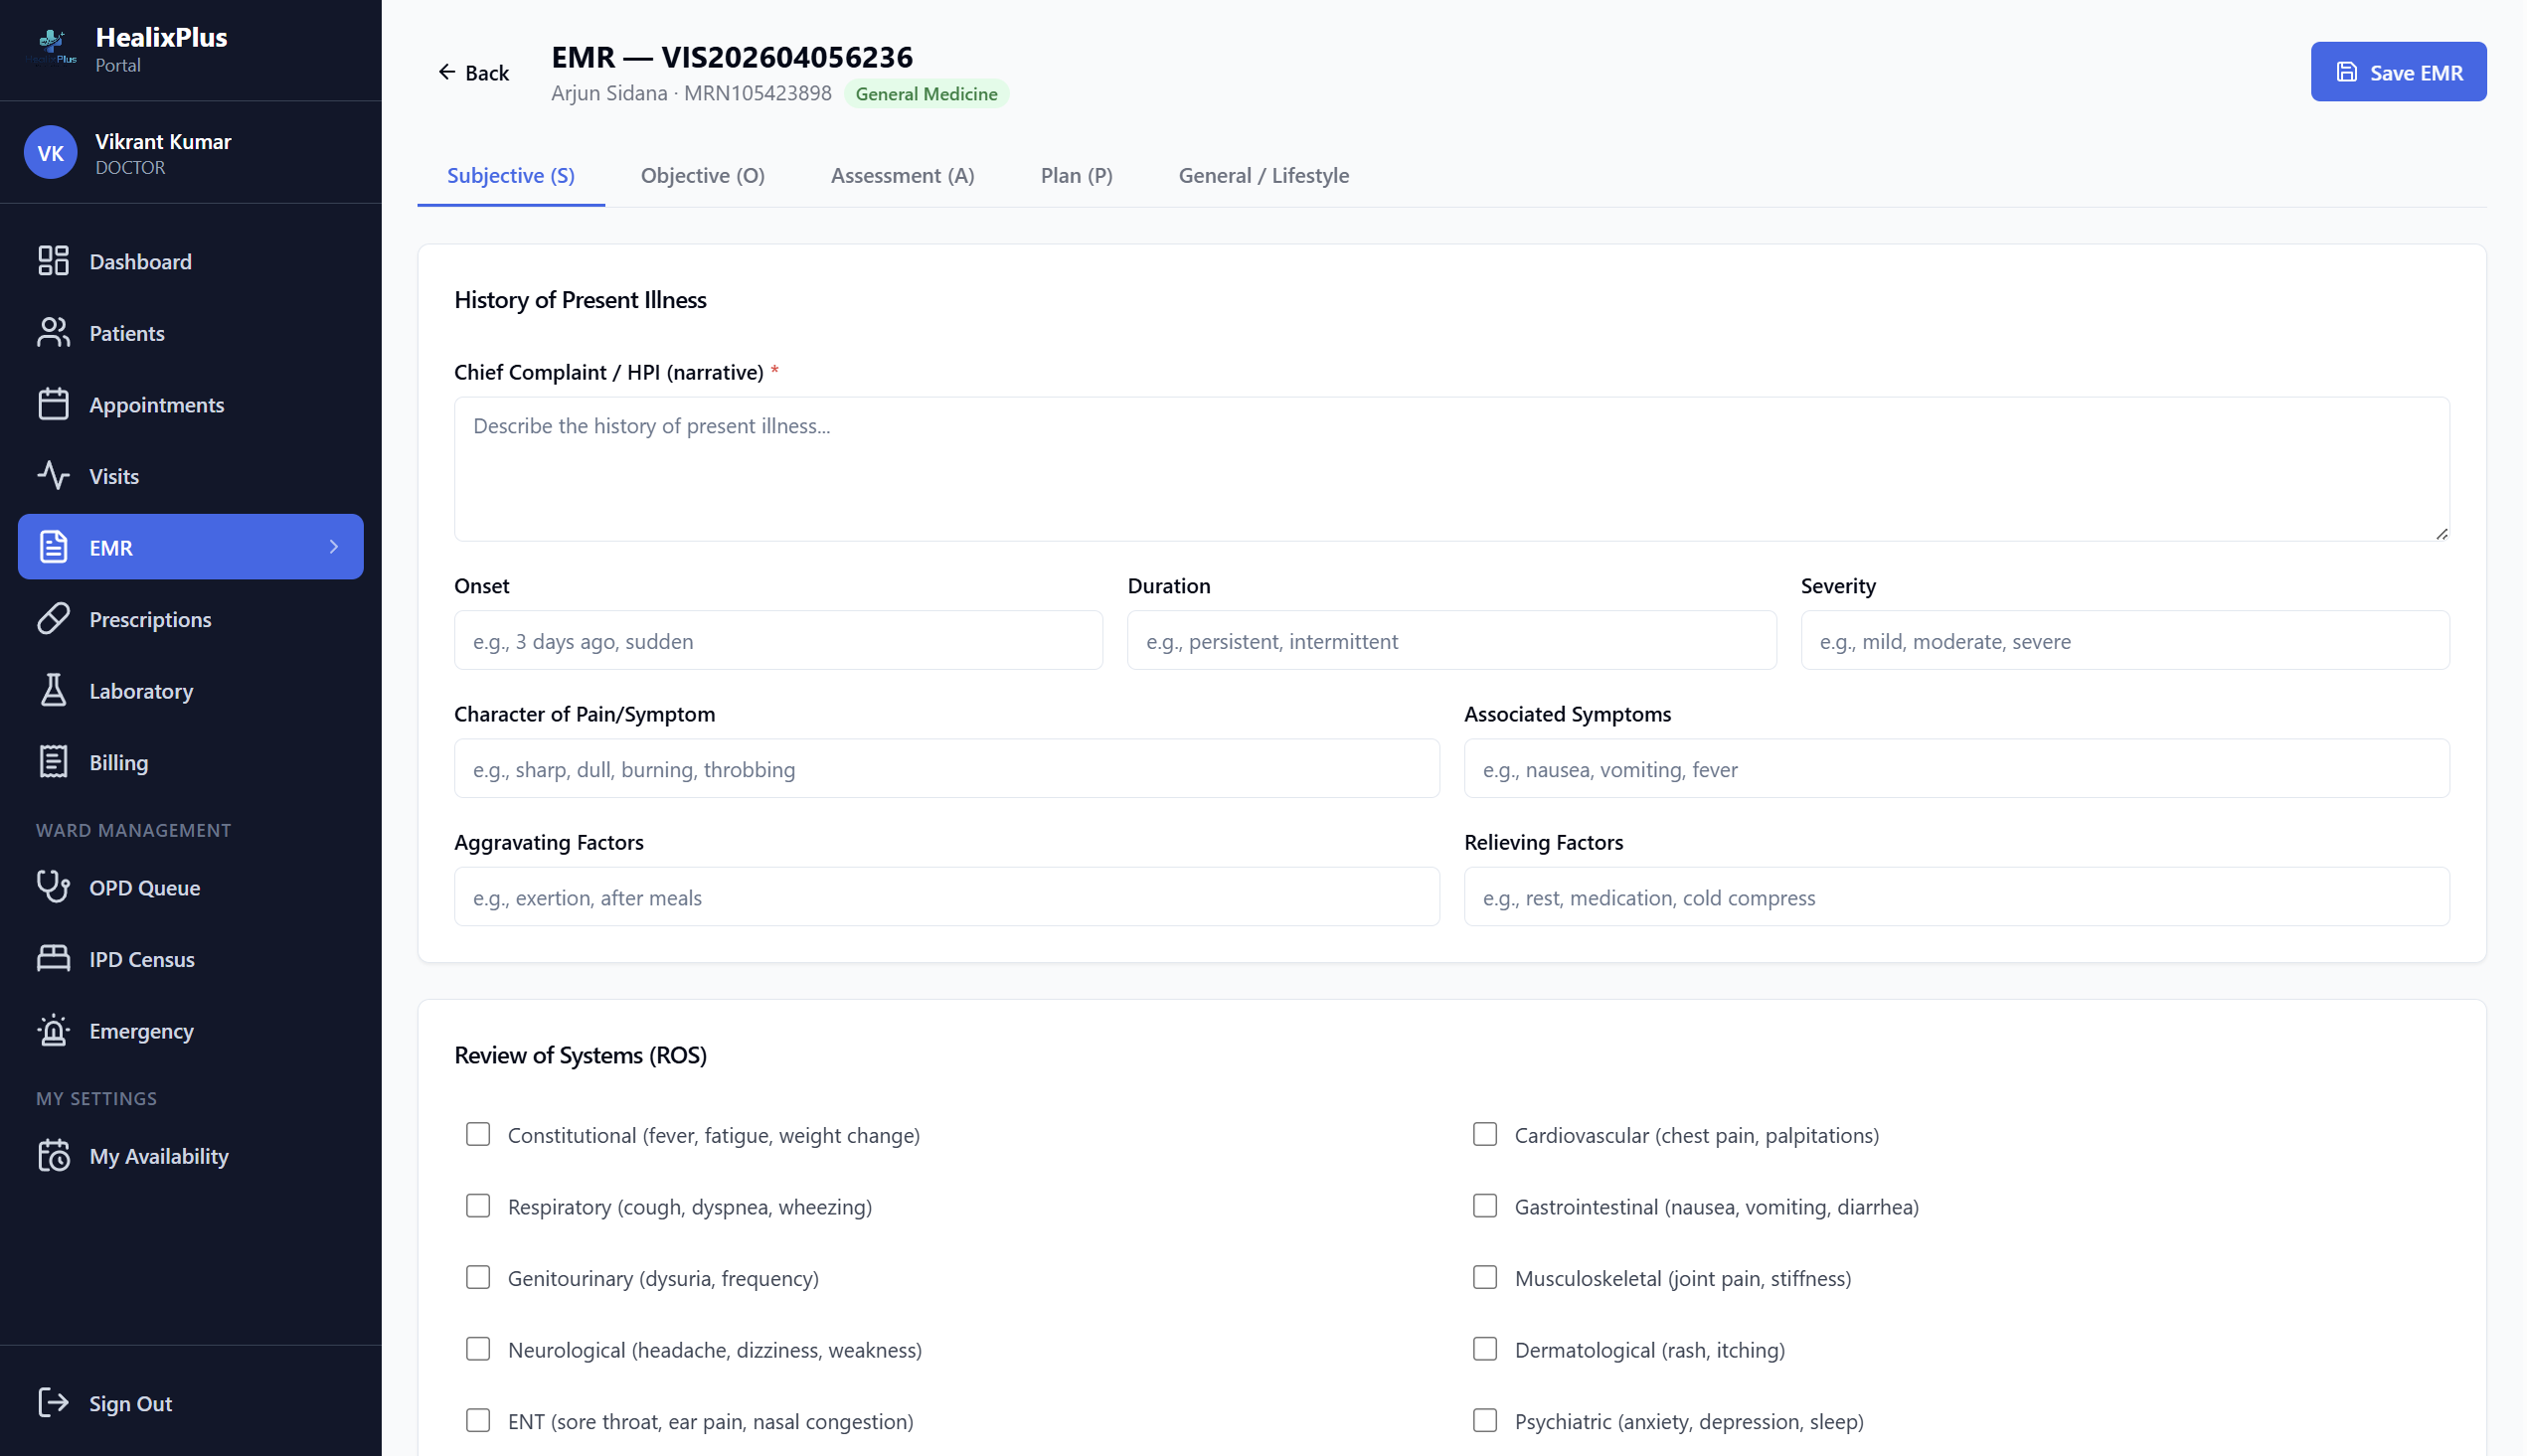
Document SOAP EMR
The doctor records the clinical encounter in MoHFW-compliant SOAP format. Primary and secondary diagnoses are coded with ICD-10. Differential diagnoses and clinical reasoning can also be documented.
- ✓S — Subjective: symptoms, onset, duration, severity, aggravating/relieving factors
- ✓O — Objective: system-wise clinical findings (CVS, Respiratory, Neuro, GI, etc.)
- ✓A — Assessment: primary ICD-10 diagnosis + secondary diagnoses + differentials
- ✓P — Plan: treatment plan and patient instructions
- ✓Multi-specialty referrals with urgency levels (Routine / Urgent / Stat)
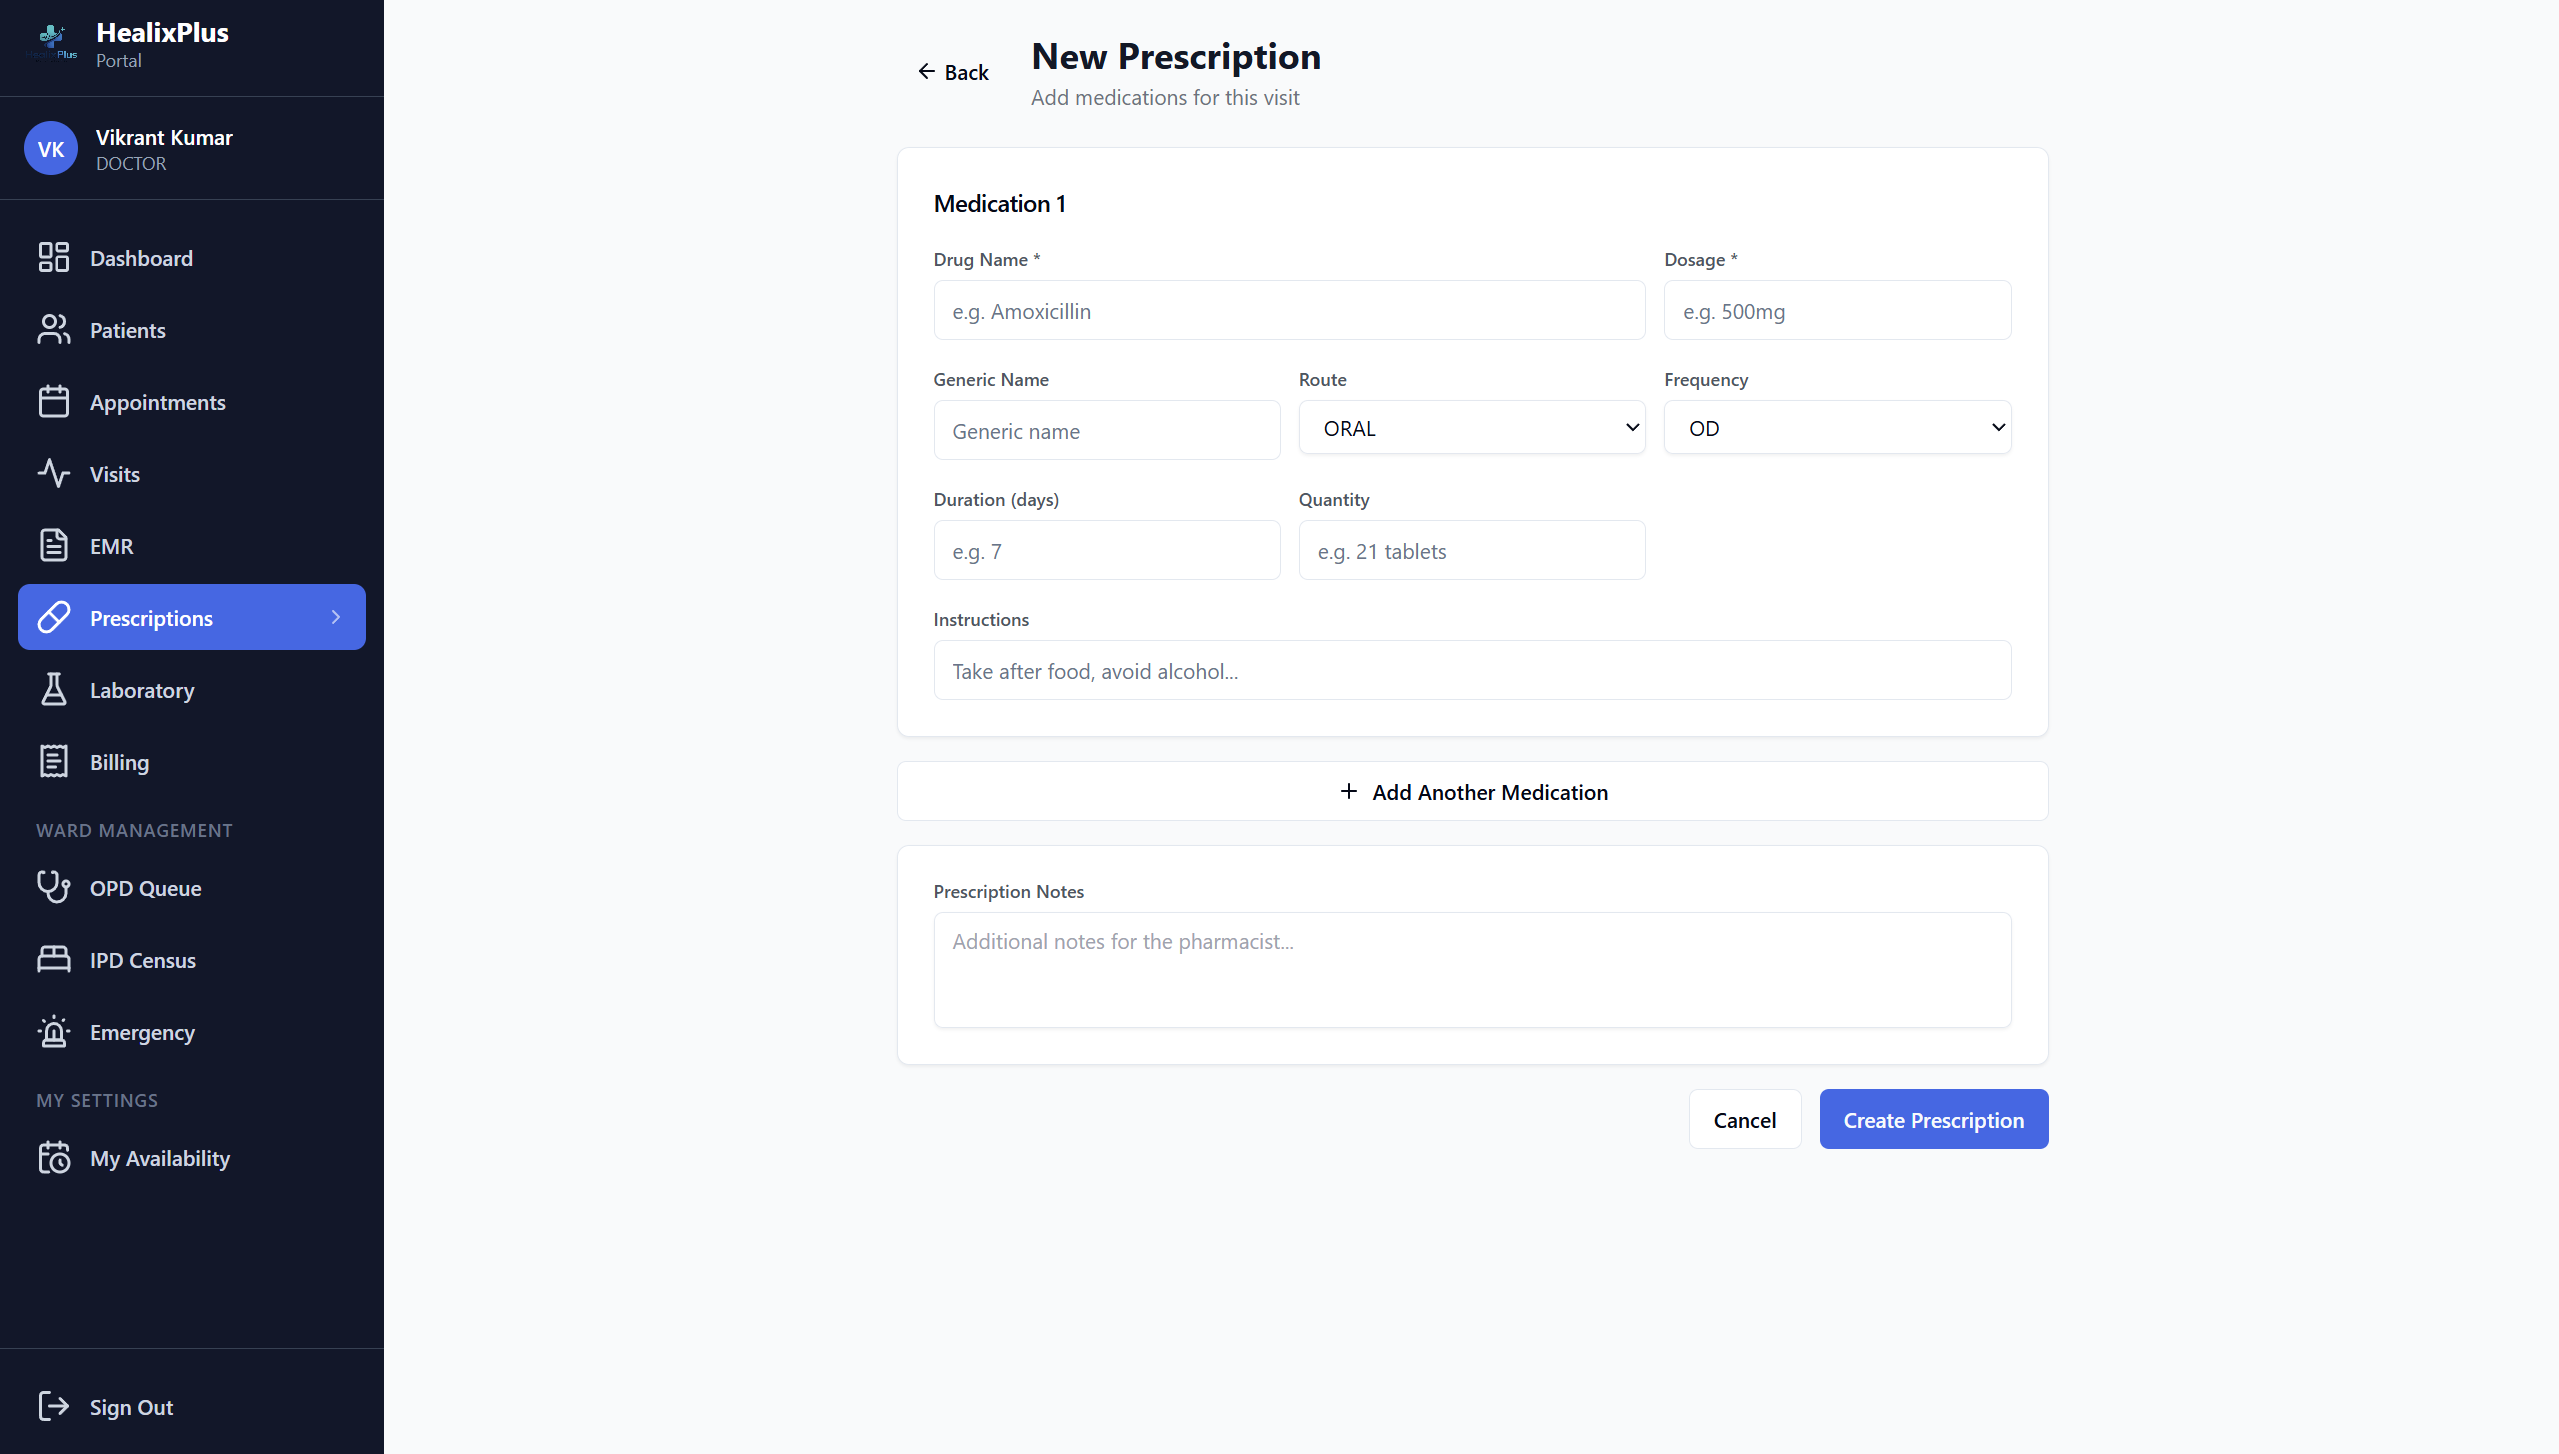
Order Labs & Issue Prescription
The doctor orders lab tests at the required priority and issues an e-Prescription. Before finalising the prescription, the system automatically checks for drug-allergy conflicts against the patient's allergy list.
- ✓Lab order priorities: Routine / Urgent / STAT
- ✓Multiple tests per order; specimen types specified
- ✓Prescription: drug, dose, route (Oral/IV/IM etc.), frequency (OD/BD/TDS etc.), duration
- ✓Drug-allergy conflict check fires automatically — alerts if conflict detected
Finalise EMR & Issue Discharge
The doctor finalises the EMR — locking it with their name and timestamp. For admitted (IPD) patients, a Discharge Summary is issued covering final diagnosis, procedures performed, condition at discharge, and follow-up plan.
- ✓Finalised EMR is locked — no further edits
- ✓Authorship: doctor name + exact timestamp recorded
- ✓Discharge Summary: final diagnosis, procedures, condition at discharge
- ✓Follow-up instructions: diet, activity restrictions, next appointment

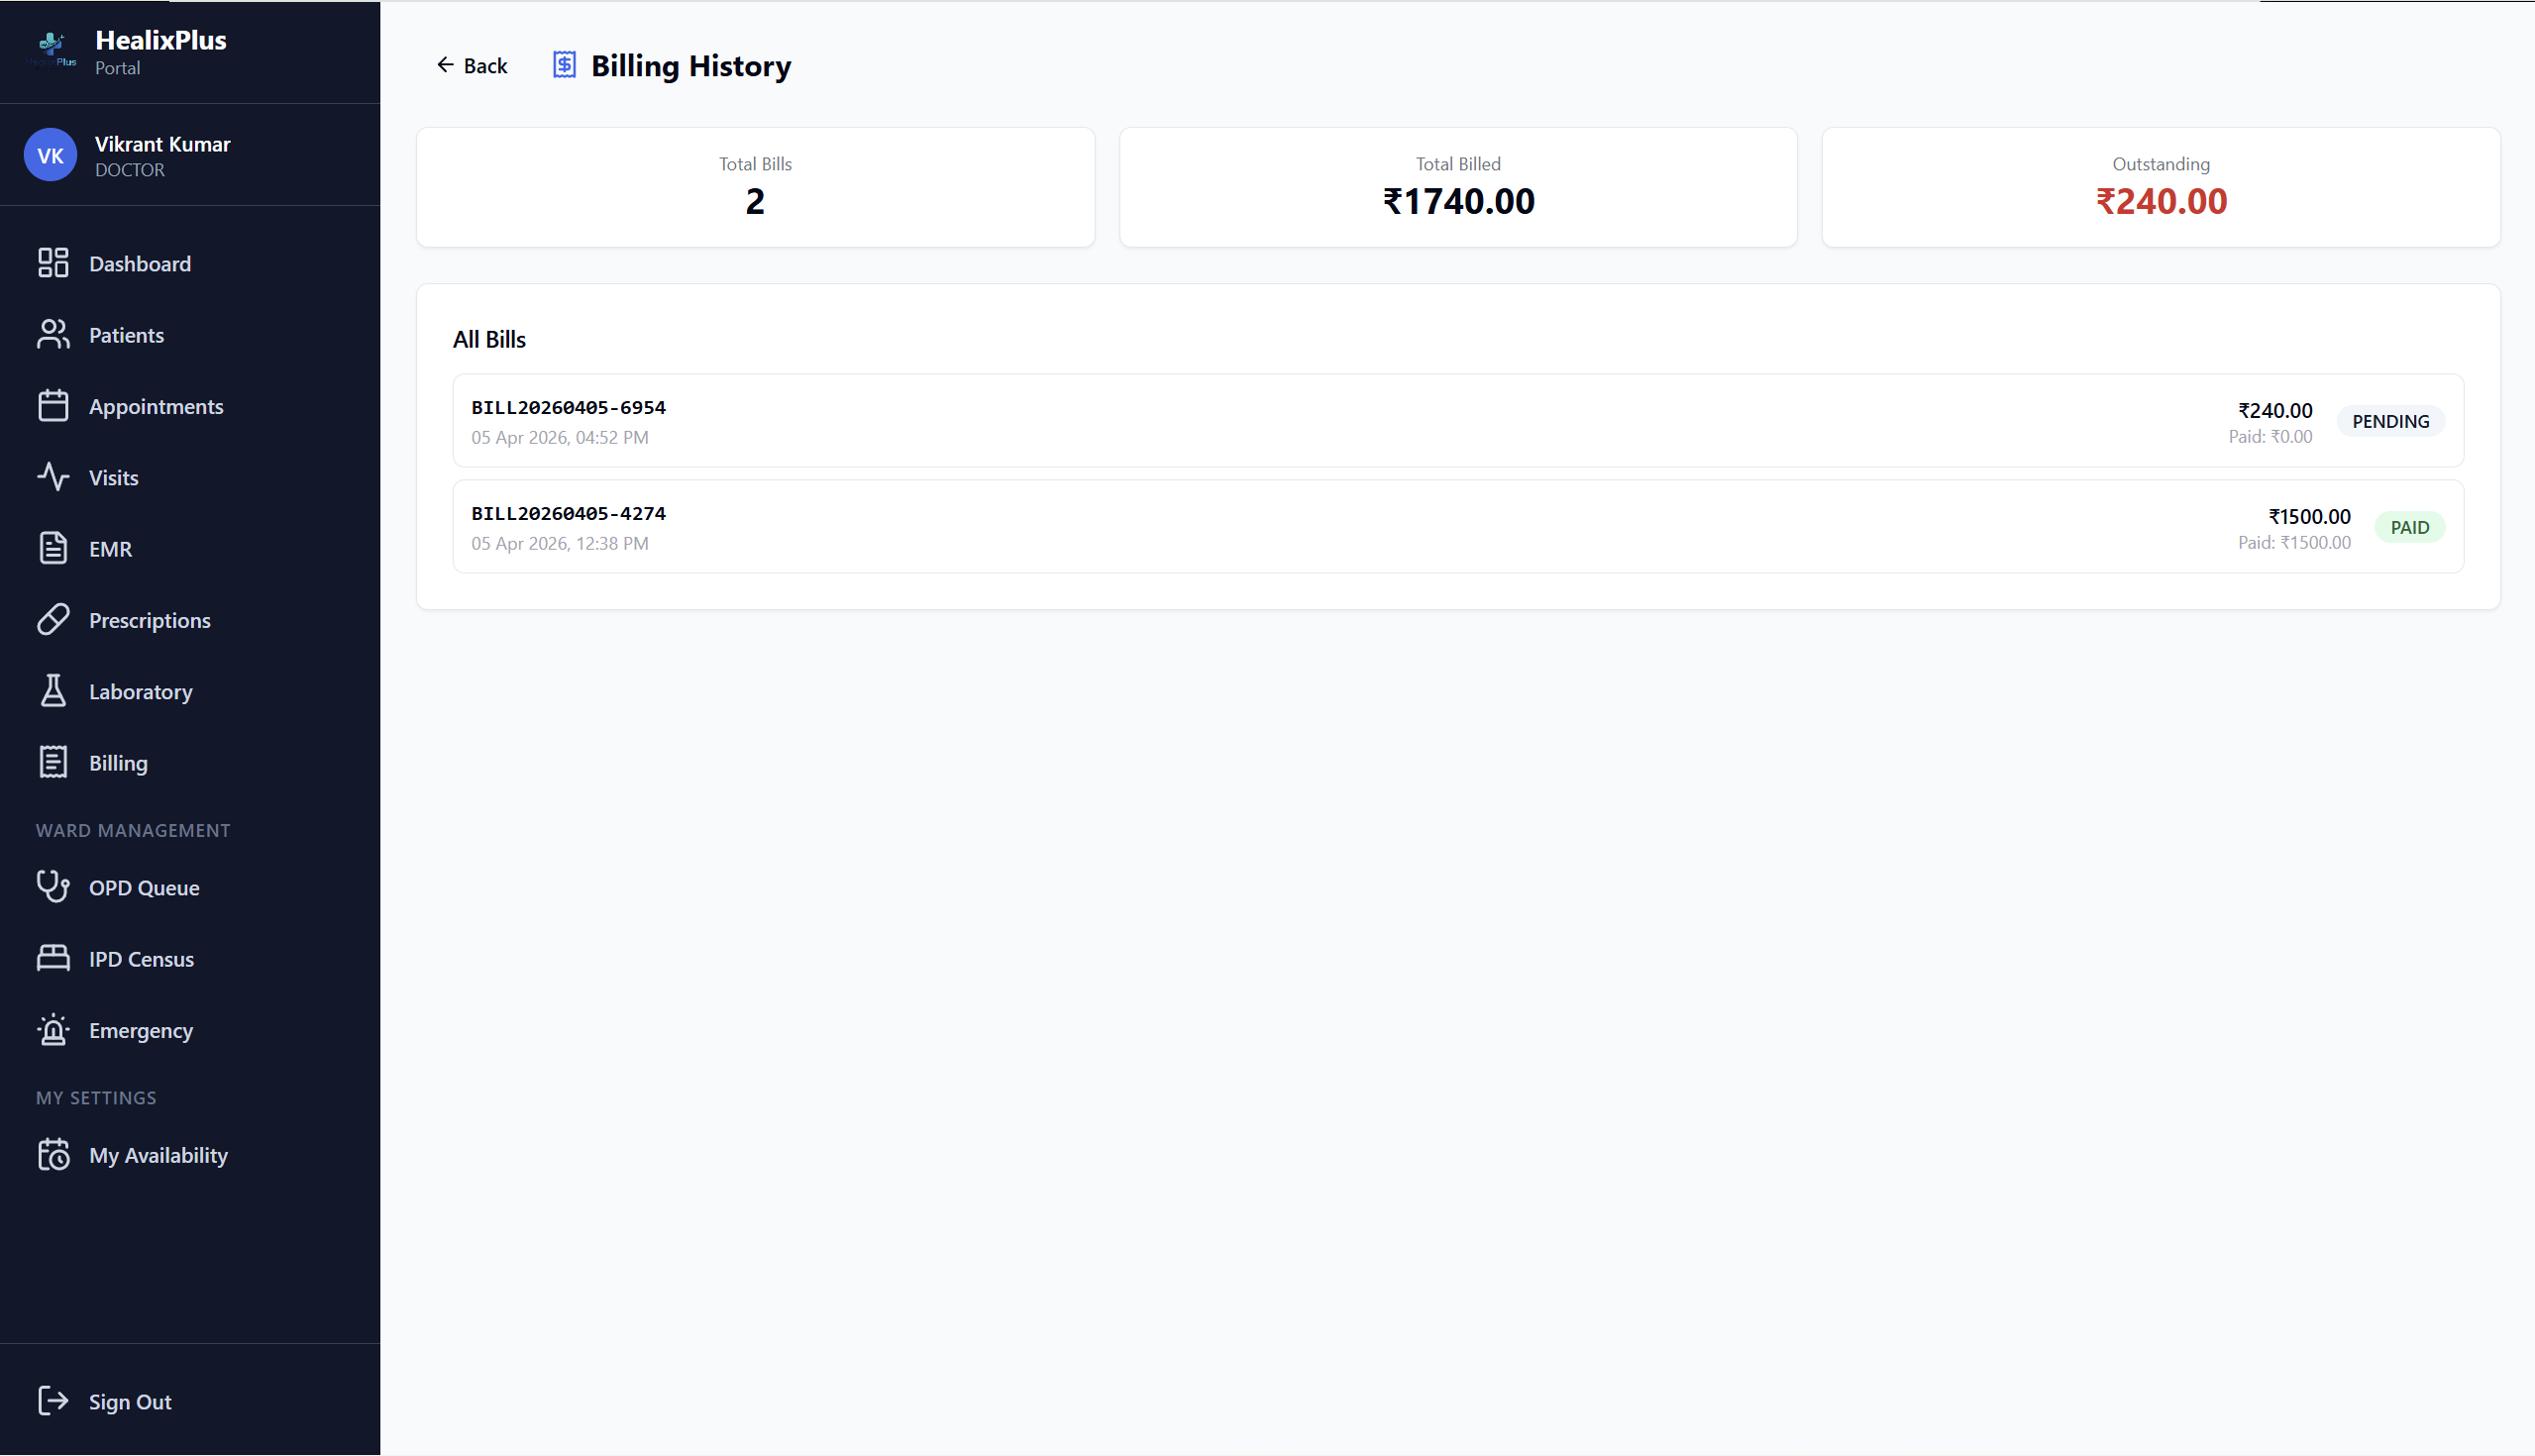
Generate Bill & Collect Payment
The receptionist or billing staff generates an itemised bill. Every service rendered during the visit — consultation, lab tests, medicines dispensed, procedures, room charges — is automatically pulled in. Payment is collected and a receipt issued.
- ✓Bill auto-populated from visit services (no manual entry needed)
- ✓Item types: Consultation, Medicine, Lab Test, Procedure, Room Charge
- ✓Payment methods: Cash, Card, UPI, Insurance, Cheque, Online
- ✓Partial payment and discount support
- ✓Print-ready A4 bill layout with itemised breakdown
Ready to see it live in your hospital?
Book a personalised demo and our team will walk you through the entire portal tailored to your facility.
Request a Demo